LEARN@IGP
19
Dynamic Remix
The purpose of Dynamic Remix is to allow the inclusion of maintained information pages from a source document into multiple target documents. Updated: 07 February 2014
Dynamic Remix Overview
Dynamic Remix is an extension to the core static remix feature.
The purpose of Dynamic Remix is to allow the inclusion of maintained information pages from a source document into multiple target documents. The latest maintained version of a source section is the one that is always included in a dynamic target document when a format of any type is generated for the target document.
All source document changes will reflect in the dynamic document remixed section including content, components and CSS.
In this documentation the Source is the document where the dynamic remix page is maintained. The Target is the document into which the source remix page is inserted.
One Source dynamic remix page can be inserted into multiple target documents.
Example:
A publisher may have a number of authors who produce new books frequently. The "By the Same Author" page is maintained in its own document and the "By the Same Author" section is updated each time a new book is released. If an book that is several years old is regenerated in any format, the latest updated version of the "By the Same Author" will be inserted into the generated format.
How to Add a Section to a Dynamic Mixmark List
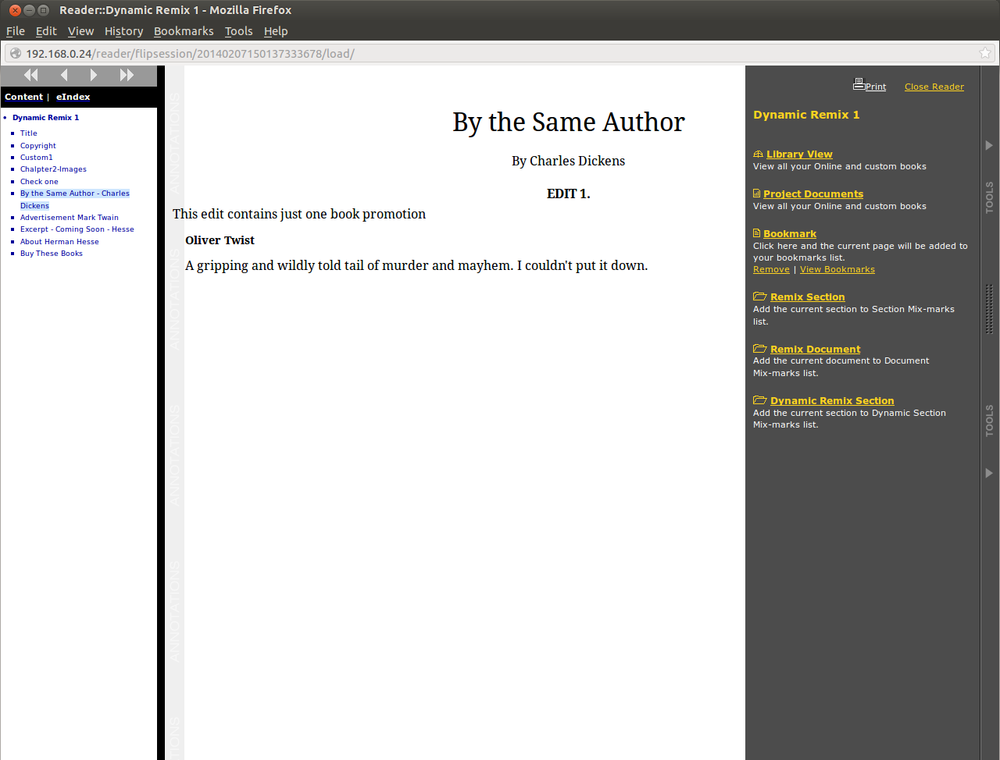
Dynamic Remix Section option available on the IGP:Reader interface
Dynamic sections can be added to the Mixmark Remix list from the IGP:Reader interface.
- Open the IGP:Reader tools sidebar. There is an option Dynamic Remix Section.
- Navigate to the document section you want to add to the Dynamic Remix list.
- When that section is visible from the IGP:Reader tools panel click the Dynamic Remix Section option.
- You will see a message indicating the section has been added to the Dynamic Remix list.
NOTE: You can only add document sections for Dynamic remixing. You cannot add complete documents.
Managing Dynamic Remix Mix-Marks
You must have Account Adminstrator priveleges to manage Mix-Marks.
From the Administrator toolbar, click on the Remix button. The Remix Administration Interface will open.
Here you can see all of your Document, Section and Dynamic Mix-Marks.

Sample Remix dialog. Your Mix-Marks are all available in the Remix interface and can be reorganized into Categories like bookmarks.
Your Dynamic Remix Mix-Marks will have a blue background. The administration tools are identical to standard Mix-Marks.
Inserting a Dynamic Mixmark Into a Document

You receive an overlay message
when the dynamic remix has
been completed.
- This assumes you have already added the required Dynamic Remix sections to the Mix-Marks list.
- Open the target document in IGP:Writer.
- Use the TOC to navigate to the Section prior to where the dynamic remix section is to be inserted.
- To view the available dynamic Mixmarks from the IGP:Writer document toolbar click Section Tools.
- Click on the Insert Mix-Marks button. The Remix dialog will open in the Tools Panel.
- Dynamic Mixmarks items are shown with a blue background on all Remix Interfaces.
- You can click the IGP:Reader button on any Mix-Mark to check the section is the one you want to insert.
- Click on the Insert In Document button.
- You can also select the FX Only option in which case only the XHTML content will be remixed and no CSS.
- The selected dynamic remix section will be inserted into the document after the TOC item you have selected and the IGP:Writer TOC will refresh.
- You can use the standard Table of Contents organization tools to position the inserted item anywhere.
When you open the Dynamic Mix-Mark section of the target document in IGP:Writer you will see the following message in red:
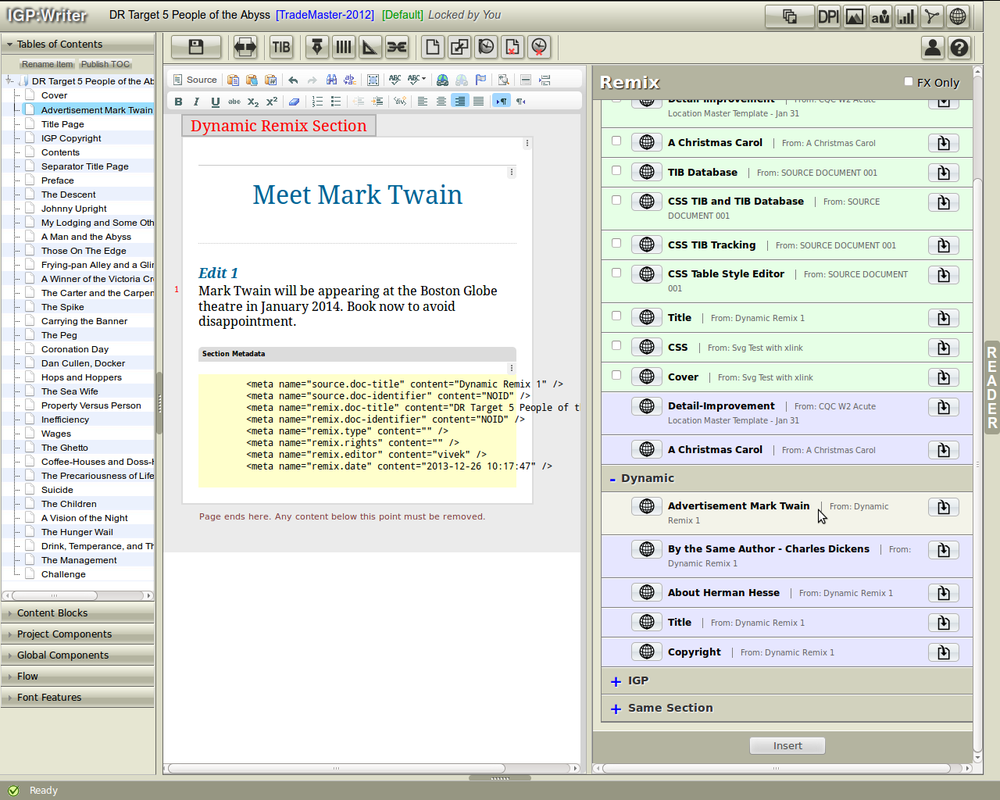
Dynamix Remix Section
Dynamic Remix Section: This message indicates that the section was remixed using Dynamic Remix feature.
You must not edit these pages as any changes to the source section will over-write your edits.
Dynamic Re-remix Interface
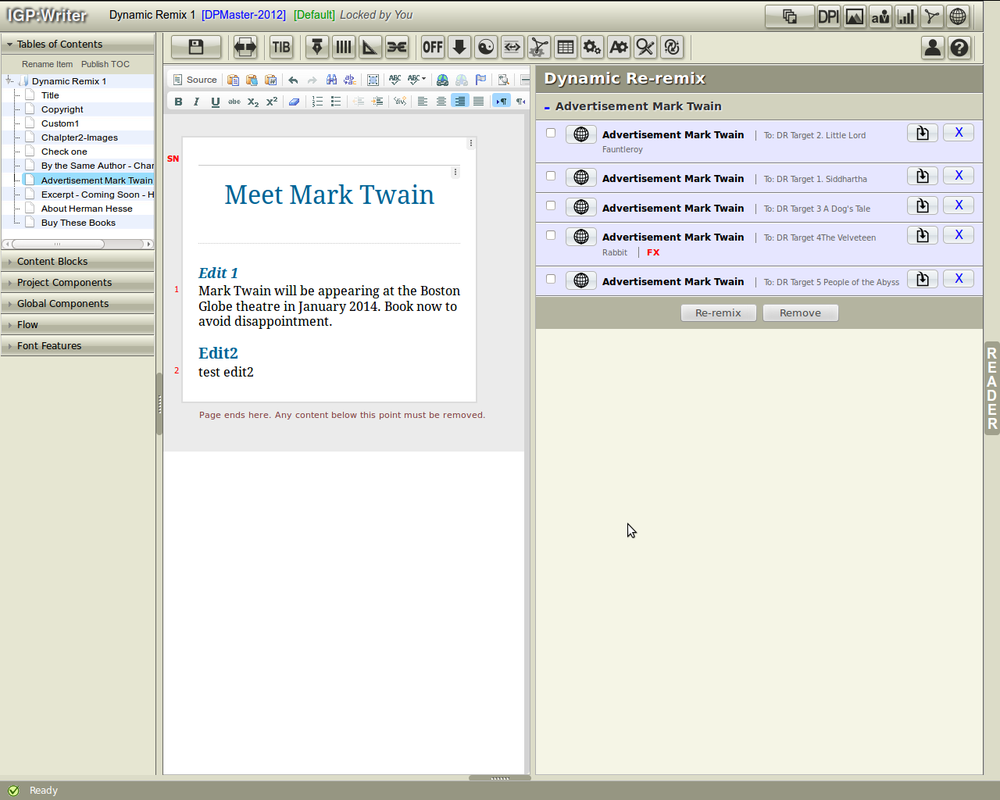
Dynamic Re-remix Interface
Click the Editing Tools button on top of the Writer interface. This will expand to show a series of options from left to right. The last button available here is Dynamic Re-remix.
Click this button to lauch the Dynamic Re-remix interface in the Tools panel on the right hand side.
Here you will see a list of existing sections that are added to the target document using Dynamic Re-remix.
Click the "+" icon against a particular section. This will expand to show two additional options against the particular section name i.e. Update in Document and Remove from Dynamic Re-remix.
The functionality of each of these buttons in mentioned below.
Update in Document: This process updates all Dynamic sections according to changes in Source section.
A. HTML Content: Content of Dynamic Section is replace with content of updated Source Section according Remix rules.
B. Components: Components are also copied from the Source document to the Dynamic document.
C. Design Profile: CSS in target document will be replaced with new CSS in Re-remix process.
If User Remix Section as Dynamic Remix then CSS will be updated in Dynamic Re-remix of target document for every Design Profile.
But if User removes Design Profile from Source document and updates
Dynamic Section by Re-remix process then CSS for the removed Design Profile
will not be removed for target section.
Click the Update in Document button to update the changes made in the source document to the target document.
Remove from Dynamic Re-remix List: Click this button to remove a particular section from the Dynamic Re-remix list.
Upon clicking this button the particular section will be removed from Dynamic Re-remix list of the source document
The message Dynamic Remix Page that previous appeared in Red will not be visible anymore for the particular section of the target document.
Other than the two buttons Update in Document and Remove from Dynamic Re-remix you will see few additional button. The names of these button are as follows along with their functions.
Re-remix: Use this option when you want to re-remix one source section in multiple target documents. Select the check-box against each section and click the Re-Remix button to re-remix the source section in multiple documents.
Remove: Use this option when you want to remove multiple sections at the same time from the Dynamic-Remix list. Select the check-box against each section and click the Remove button.