LEARN@IGP
18
Remix
How to remix documents and sections using the Remix strategy. Creating Mix-marks lists using IGP:Reader, familiarization to the Mix-marks interface, how to apply Mix-marks in a document using IGP:Writer. Updated: 2013-04-12
Overview
Using Remix you can remix documents (complete) or FX sections (Eg: Chapter) of a particular document or several documents and add them to a personal Mix-mark list.
Remixing Documents is a three step process:
Add Mix-marks to your Remix list
Organize your Remix List
Use your Mix-marks to create new documents or insert sections into old documents.
The Remix Rules
- Mix-marks are only available to users with Administration privileges. General Users can see the Mix-mark interface but have no mechanism to add Mix-mark documents or sections.
- A Document or Section can only be added to the Mix-marks list if it has not been previously Remixed. IE. In the current version you cannot Remix a Remixed section.
- Mix-marks are a pointer to an existing document or section in the Library, a Project or Private Documents. If the source document is deleted then all Mix-marks will be removed.
Introduction to Mix-Marks 
There is a new Mix-Marks interface in the Writer section. This new functionality will allow users to mark the sections that can be reused in other documents.

How to create a Mix-marks
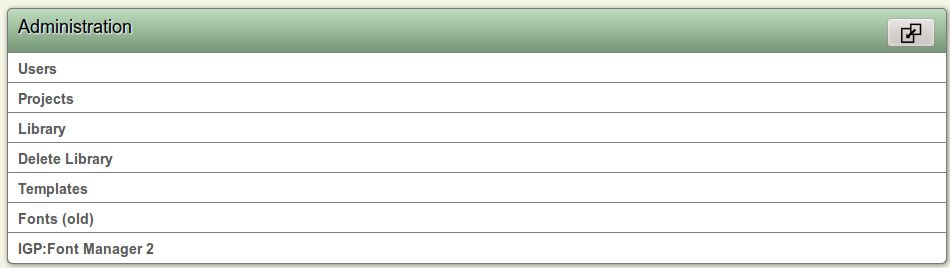
- You must be in the Administration panel.
- Open a source document (from Private Documents, Projects or Library) and click the Read button on the document toolbar. The document will open in the IGP:Reader.
- From IGP:Reader open the side Tool Panel. At the bottom there are two Options Remix Section and Remix Document.

Remixing a Section
- Using the IGP:Reader Contents bar, navigate to the Section you want to add to your Mix-marks list.
- Click the Remix Section option.
- A confirmation message will be displayed indicating the section has been added to the Mix-mark list.
- You can now continue and add more Sections to your Mix-mark list.
- You can only add any specific section to your Mix-mark list once.
- When you have finished remixing documents or sections just close IGP:Reader. There is nothing else to do.
Remixing a Document
- When your target document is open in IGP:Reader, to add the entire document to the Mix-marks list click the Remix Document option.
- A confirmation message will be displayed indicating the document has been added to the Mix-mark list.
- You can now continue and open and add more Documents to your Mix-mark list.
- You can only add any specific document to your Mix-mark list once.
- When you have finished remixing documents or sections just close IGP:Reader. There is nothing else to do.
Viewing and Organizing your Mix-marks
You can view and organize your Mix-marks from your administration account.
- On the Administration interface click the Remix button on the top right hand corner. This will open your Mix-marks catalog.
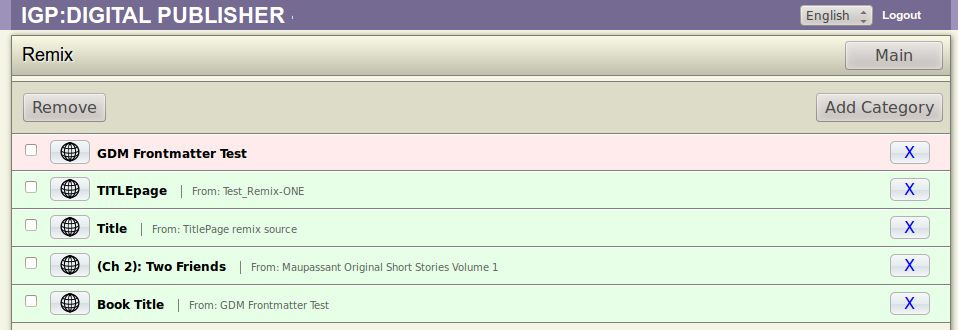
- The first time you open the Mix-marks catalog it will be empty.
- If a document has been added to the Mix-mark list it will have a pink background.
- If a section has been added to the Mix-mark list it will have a green background.
- When Mix-marks are added they accumulate in the top of the Mix-marks catalog. You can now organize these using Category bars.
Creating Organization Category Bars
- Click the Add Category button on the Remix catalog toolbar. A dialog will open.
- Enter the name of your category. This is free-form text, but will be sorted alphabetically if you create a number of categories.
- Click the OK button to create the category. The process will take a few seconds.
- Click the Cancel button to close the dialogue without making any changes.
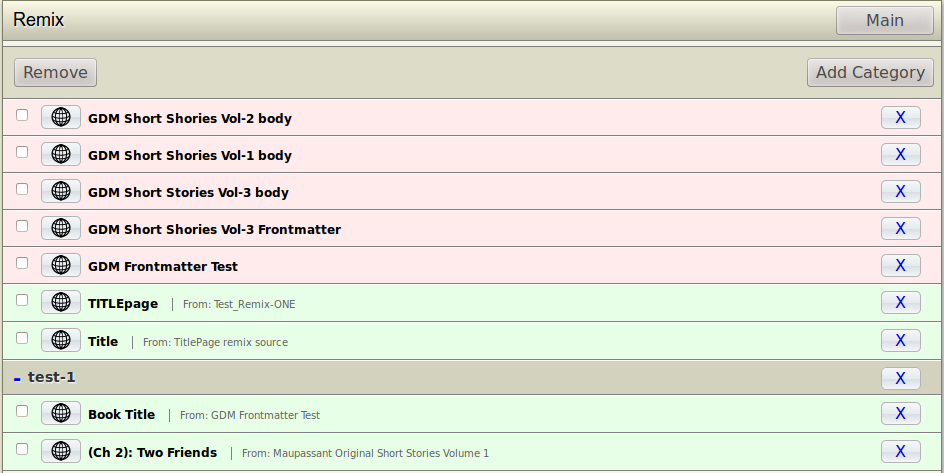
- Click the + button on a Category bar to open it.
- Click on any Section or Document Mix-mark bar and drag and drop it into a Category. You can reorganize these in any way at any time.
- To close the Category click the - button on the open Category bar.
Deleting in the Catalog
- You can delete a Category bar by clicking the X button on the bar. This will delete all the Mix-mark items along with the Category so if you want to retain Mix-marks drag them out of the Category before deleting the bar.
- You can also delete or remove any individual Mix-mark from a the Category. To do this click the “+” sign to open the category. This will show you the list of items that are available under the Category.
- You can then click the button“X” “Remove document from Remix2” towards the extreme right hand side of the section or document.
- You can also delete or remove multiple documents from the Category. Select the check-boxes against the documents or sections that you want to remove. Click the Remove button on the top left hand corner of the Remix window. Wait for a few seconds and the open the particular Category once again to check if the section are deleted.
How to use Mix-marks
- To start you must create a blank document where you wish to apply the mix marks.
- You can insert Mix-marks into a document from IGP: Writer.
- Open the target document where you want to add the Mix-marks sections from the Writer.
- From the Table of Contents select the section you want the remixed section or document to be inserted after.
- Once this done click the Section Tools button on top of the Writer interface. A new button called Mix-marks will appear here. IGP: Writer|Section Tools|New Section dialog this is where you will see the Insert Mix-marks button.
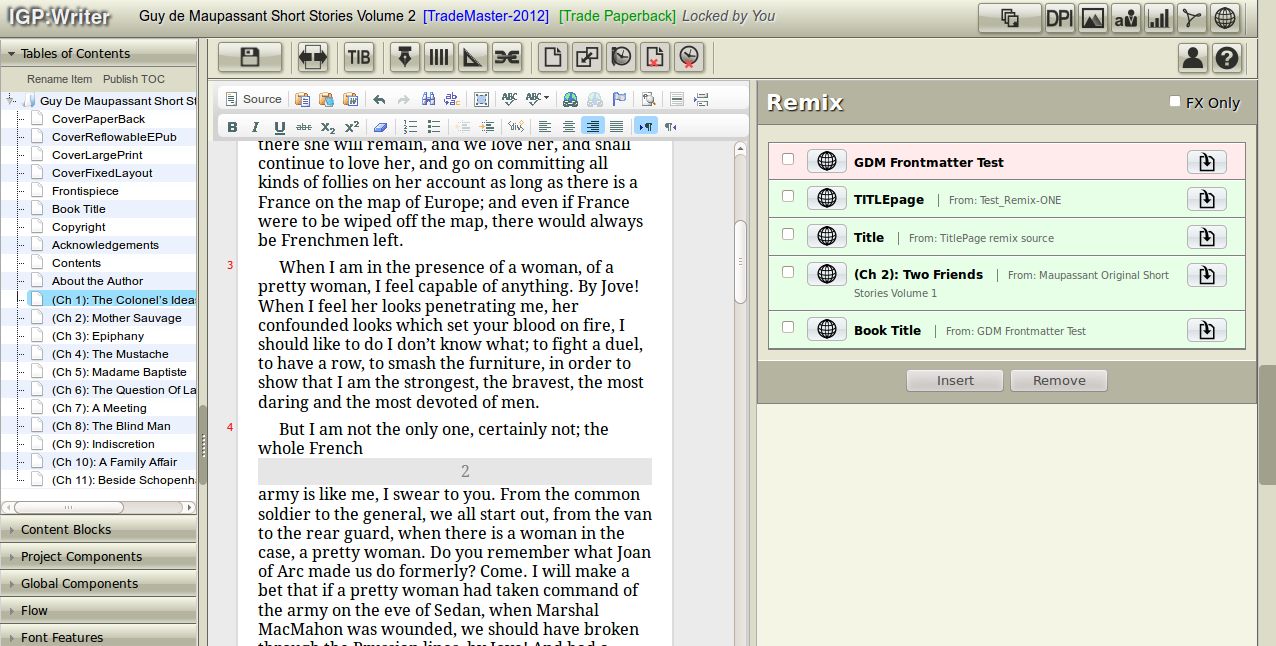
- Click the Insert Mix-marks button . This will open the Mix-marks list on the right hand side and will present you the remix options.
FX Only
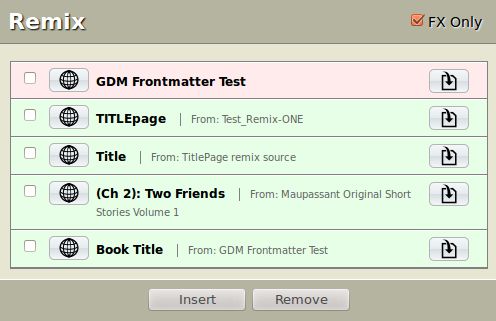
While inserting a particular section or a complete document using the Mix-marks list you will get to see the option “FX Only” on the top right hand corner of the Remix bar.
The FX only option will need to be checked only when you want the XHTML to be inserted in your document with No CSS, No Typography or no other data such as styling is required to be transferred into the target book.
Remix a Single Section
- To insert a single section click the Insert in Document button on the right hand end of the required section.
- This action will not only insert the section and process all CSS, Typography and other data into the target book.
- Reload the Writer section to see if the Section has got added successfully. Since TOC is not currently refreshing after a Remix operation.
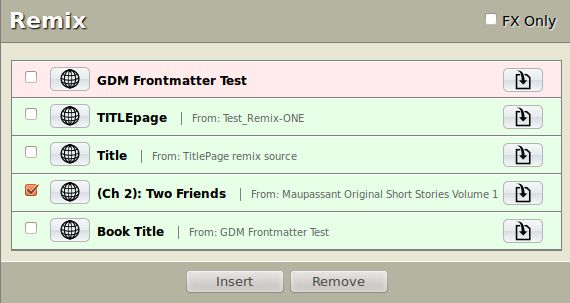
Remix Multiple Sections
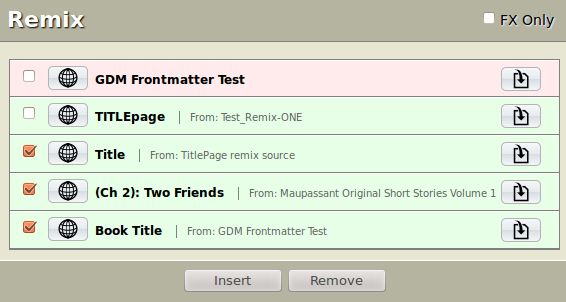
- You can remix multiple section by individually selecting the check box next to each required section.
- Set the FX only button depending on your requirement.
- Once you have selected the multiple sections that you want to insert click the “Insert” button on the bottom toolbar.
- Depending on the number of sections you have selected this operation may take a several seconds to complete.
- The IGP:Writer Table of Contents will automatically update when all Remix processing operations are complete.
- Depending on how you carried out your Remix operation you may have to reorder them using the TOC drag and drop feature to create the correct sequence.
Remix a Document

- This process of remixing a complete document is similar to remix a section.
- Set the FX Only check-box if required.
- Click the Insert in Document button on the right hand side of the required document.
- This will insert the entire document into the selected TOC position .
- Once you have completed the process of inserting the Mix-marks section to the target document you can then generate formats or continue to complete the remaining work on your document.
References and Resources
For more information and guidance on using the IGP:Digital Publisher REMIX feature refer to these articles:
Blog Post. Remix One. Guy de Maupassant. Introduction to Remix preparation.
APEX@IGP. Guy de Maupassant Short Stories. 16 books in five formats remixed with different variations. This is the official IGP REMIX test case for trade books.