LEARN@IGP
38
Manuscript Importer Using CSV File
This document details the process of creating and managing your own custom Manuscript Importer.
Overview
You can create your own customized manuscript importer for IGP: Digital Publisher using your in-house custom word processor styles.
This is done by mapping your house paragraph and inline styles to the required IGP:FoundationXHTML elements and attributes.
You can create multiple manuscript importers depending upon the requirement and these importers can then be managed in the IGP:Digital Publisher account administration.
- To start with you must be logged in as Administrator user.
- Under the Administration interface click the option Templates to open the Template Manager interface.
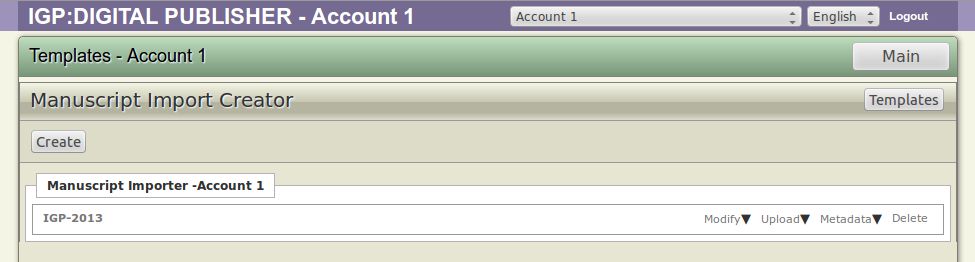
- Click the Manuscript Importer button available on the top right hand corner.
- This will open the Manuscript Import Creator interface. Click the Create button here.
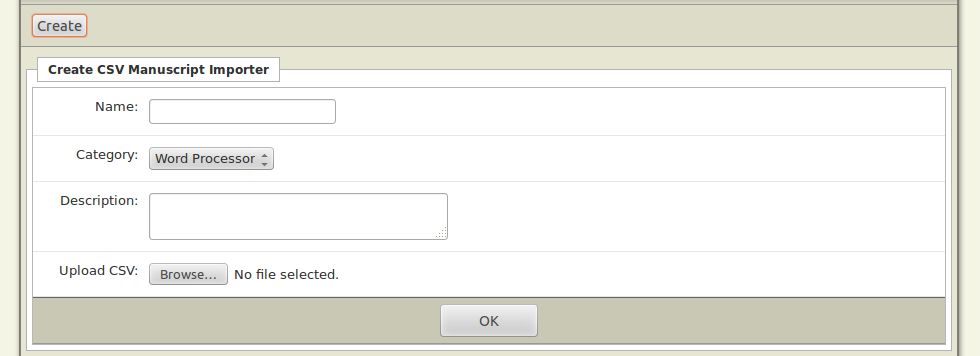
- Enter the required information in the blank field of the Create CSV Manuscript Importer form.
- Name: You must enter the name of your Manuscript Importer here. This is the name that will show in the Upload Document interface. The name may contain spaces or hyphens if these are required.
- Category: Select any one of the two categories here to synchronize the custom importers i.e. Word Processor, Custom XML.
- Note: Depending upon the category you select here; the Manuscript Importer will display under the same category when users attempt to import a Word document , XML file or a package in the system.
- Description: Enter the description of the "Manuscript Importer" you are creating.
Once you have entered all the information click the Upload CSV button to upload the CSV (spreadsheet) file you have already created for your Manuscript Importer.
To complete this process click the OK button.
Note: If you are logged in as Maintainer you must click Master Templates to open Template Manager interface. In addition the Maintenance login rights allow you to share the Maintenance user created Manuscript Importer to all IGP: Digital Publisher accounts using "Shared For Use" check-box field.
The newly created Manuscript Importer will now show in the list along with its name.
Administration Options
After the creation of a Manuscript Importer the importer will be added in the account importer list. However, along with the Manuscript Importer you can manage the importer using associate text buttons, you will find these buttons on the right side of Manuscript Importer.
The four buttons that are available here are, Modify, Upload, Metadata and Delete which can be used to manage the importer. The functionality of each these buttons is explained below.
Here is the description of the associate text buttons
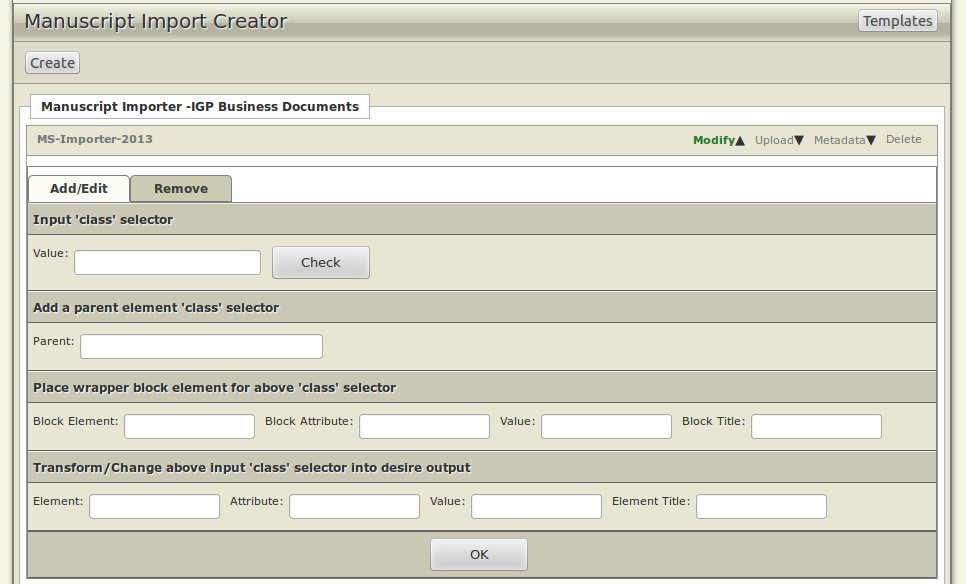
- Modify: Click the Modify button and this will expand to show you the options to Add/Edit an existing file. Click the Remove button if you want to remove the existing button.
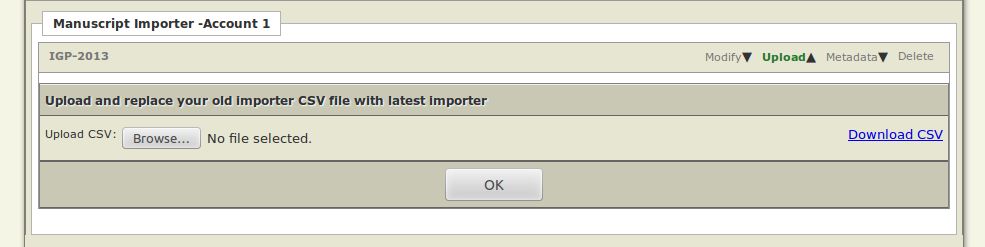
- Upload: Click this button to upload and replace your old importer CSV file with an updated Importer at any time. Click the Download CSV link on the right hand side to export and save a copy of the current CSV file.
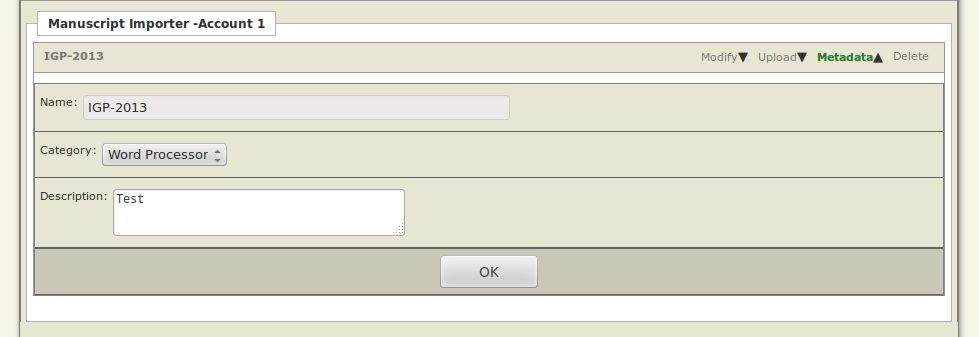
- Metadata: Click this button to modify the Category and Description of a Manuscript Importer. Click the OK button in order to save your changes.
- Delete: Click this button to delete a Manuscript Importer from IGP:Digital Publisher.This cannot be undone.
Note: Upload CSV file will replace your previous uploaded CSV file so be careful while uploading the CSV file after creation of “Manuscript Importer”.
The Cross-walk Spreadsheet
To use this “Manuscript Importer” feature you must know how to create the “cross-walk” spreadsheet file(CSV file).
Tips to create the "Cross-walk" Spreadsheet file.
As CSV is the main interactive part of this feature, you can list the styles or elements in the CSV with element translation logic.
There are eight fields are given in the CSV file to map the styles or elements i.e.
- Value This field contains the element style or element name
- Block Element This define the block element name e.g. div
- Block Attribute This define the block element attribute e.g. class
- Block Value This define the block element attribute value e.g. block-rw abstract-rw
- Block Title This define the title of the block element e.g. TextBlock Abstract
- Element This define the element or styled element translation name e.g. p
- Attribute This define the element attribute e.g. class
- Value This define the element attribute value e.g. decoration-rw
Note 1: Ensure that element style or element name should not be the same in your manuscript.
Note 2: Ensure that the spreadsheet you have created is saved as .CSV format (Comma Separated Value).
Strip Element / Delete Element
Strip Element: You can also strip a particular element and can still retain the content by entering the term "strip-element". The term "strip-element" must be entered under the "Element" column (Column G). This term must be entered against the particular element you want to stripped.
Delete Element: You can eliminate a particular element along with the content simply by entering the term "delete-all". This term must be entered under the "Element" column (Column G). The "delete-all" term must be entered against the particular element you want to be deleted along with the text.
Add Multiple Attributes to an Element in CSV
Multiple attributes can be assigned to a particular element using the CSV file.Enter the pipe "|" separated list for the block element in Column D (Block Attribute). Also enter the respective pipe separated values of the attributes in Column E (Block Value).
Similarly pipe"|" attributes can be assigned to a particular element in Column G (Element). Also enter the respective pipe "|" separated values of the attributes in Column H (Attribute).
Handling Nesting Elements
Nesting elements can be targeted in the CSV file and it can be translated using the "Parent" class selector.
There are two new coloums added to the CSV file named "Parent" and "Element Title".
Manuscript styles can further retranslated as per the requirement using its parent class selector.
For example: If you want the Epigraph Block inside a Title Block in Chapter only. Using Nesting Elements this can be handled easily using the following stepts.
- Assuming that you manuscript style is block-epigraph.
- This is usually translated is the CSV file as
| Value | Parent | Block Element | Block Attribute | Block Value | Block Title | Element | Attribute | Value | Element Title |
|---|---|---|---|---|---|---|---|---|---|
| block-epigraph | div | class | block-rw epigraph-rw | TextBlock Epigraph | p | ||||
This is the first level translation in the CSV file
- You can retranslate "block-rw epigraph-rw" style in the CSV in the following manner
| Value | Parent | Block Element | Block Attribute | Block Value | Block Title | Element | Attribute | Value | Element Title |
|---|---|---|---|---|---|---|---|---|---|
| block-rw epigraph-rw | body-rw Chapter-rw | div | class | title-block-rw | Title Section | div | class | block-rw epigraph-rw | TextBlock Epigraph |
This is the second level translation in the CSV file
- In the Value column you must enter the class value "block-rw epigraph-rw" . In this case we have defined the class of Chapter in the Parent Column "body-rw Chapter-rw" and then retranslate the element as per the requirement. In the above example we have defined the "block-rw epigraph-rw" to wrap in "title-block-rw".
Similarly you can handle the inline elements to target the span class values.
Language Translation
If your original Manuscript has a combination of two languages for example English and French where English is the "Source" language and "French" is the translation language.
Note: The Source content and Translation content must be styled in two different colors to make it easy to differentiate the two texts while translation editing is in progress. Also this makes it easy for the editor to check the translation if required.
Both these languages must be defined as a variable at the top of the manuscript document.These variables must be defined in All-Capital at the top of the Manuscript Document. Here is an example.
SOURCE LANGUAGE:: en
TRANSLATION LANGUAGE:: fr
Make sure you define the variable with a double colon "::" followed by the two letter language codes similar to the above example.Use RFC 4646 languages codes only which can have a regional modifier. Eg. en-US, Fr-CA etc.
The following styles must be applied to the Source and Translation languages.
Source Language: V-LanguageSource
Translation Language: V-LanguageTranslation
You must use the same styles and not make any modification to the naming system of these styles.
These styles must be also defined in the CSV file.
Enter the "V-LanguageSource" and "V-LanguageTranslation" in "Column A" of the CSV file one beneath the other.
Enter the element name as "Source" for "V-LanguageSource" in "Column G" (Element).
Similarly enter the element name as "Translation" for "V-LanguageTranslation" in Column G (Element).
You must then enter the attribute "lang" in "Column H" for "V-LanguageSource" and "V-LanguageTranslation".
Its time to now assing the variable to the "lang" attribute. The variable you must assign for "V-LanguageSource" is $source$. Similarly the variable for "V-LanguageTranslation" is $target$. Enter these attributes under the "Column I" (Value).
The two variables $source$ and $target$ carry the language codes defined in the Mansuscript.
You can use these variables to assign the "lang" attribute to all elements defined in the CSV file. The elements to which the "lang" attribute is assigned will show the language code upon importing the manuscript in IGP:Digital Publisher.
Administration
This all about the administration part of “Manuscript Importer”, now you need to know how to use your custom created “Manuscript Importer” in IGP:Digital Publisher.
Assuming you are a logged with User privilege rights follow these steps:
- Create a new document.
- Click the document title and select the More Tools option that is available on the right hand side. This will expand to show a few additional options.
- Click the Import Document button here. This will open the Import File interface and this will show the tabs Word Processor, Custom XML, Package and PDF to XHTML respectively. Note: The buttons Package and PDF to XHTML do not play any role in the Manuscript Import process.
- Select the appropriate button Word Processor or Custom XML depending upon the importer you have already created.
- Click the Browse button to upload the file.
- Select the option from the drop down list available against Select Format.
- Click on “Import” button to import your file in IGP:Digital Publisher.
Upon completing the import process you can now launch the document in the Writer to see how effectively the import process has worked. You can make additional changes to the document if required.
Feel free to generate the required format from the Formats on Demand interface of IGP:Digital Publisher.