LEARN@IGP
5
Quick Start
How to create a document, upload a manuscript and generate formats in under 10 minutes. Sample import wordprocessor manuscripts included. Updated: 2015-02-01
Overview
You now have access to your IGP:Digital Publisher (DP) installation or Portals account. It's time to get started and create your first DP document.
There are two video tutorials that just take 3-4 minutes to watch that will guide you through creating a document and uploading a word processor file to quickly create a format generation ready document.
There is a selection of Word Processor files at the end of this section you can download and use for your first import. We have also included covers so you can create complete books with a little flair.
Please take note of the "IGP-StructureStyling-Tutorial-Rev12.doc". This has complete instructions on how to prepare your word processor manuscript for importing.
The videos show you how to create a document and import a manuscript. You can also insert your own page sections using the Section Toolbar. For more information on this refer to the Section Toolbar Topic. We will be using Siddhartha by Herman Hesse for this Topic how-to segments.
This Topic then explains:
- How to upload a cover image file.
- How to update the book metadata so the generated ePubs are valid
- A brief overview of the main formats you will probably be interested in at the Quick start level. There are guides on generating the main formats and what you can expect to see.
Note on the video tutorials. These have been tested on Windows, Mac and Linux. They work on Android devices but don't currrently work on iPad. This will be updated in the near future.
Video Tutorials
Creating a Document
2012
3.52 (mins)
This tutorial shows you how to create a new document from the Management interface. The created document is a stub. That means it has no content in it at this point.
NOTE: Where this tutorial says use TradeMaster, use TradeMaster-2012
Uploading a Word Processor Manuscript
2012
3.06 (mins)
After you have created a document stub, you can populate the content by uploading a manuscript from a correctly structure styled Microsoft Word document, or a Libre Office/Open Office Open Document Format document. You can use file extensions *.doc, *.docx, *.odt. If you are creating your own manuscript make sure you read the tutorial document first.
Creating a New Document 
We use the term document as a general abstraction for all digital content. You could be creating a book, a manual, an interactive program, and you could be targeting print, e-books, some other delivery package or all of these.
- You can create a document when you are in Private Documents or Projects.
- If you create a document in Private documents, you are the assigned owner.
- If you create it in Projects, the project name is the assigned owner.
- This demonstrates the fact that in IGP:Digital Publisher Management a document can only have one owner.
In this tutorial you will create a document from Private Documents and move it to a project later.
- From the main toolbar click the New Document button. The document Info Metadata form will open.
- The minimum required metadata to create a new document is title.
- You must also select a template. To use the new features of DP you must select book template TradeMaster-2012 for normal novels and linear books.
- The other info form data can be updated at any time and it is generally good practice to fill metadata as completely as possible.
- Click OK. Wait for the message that the document is created.
- You can immediately create another document or, click the Private Documents button to return to the document list.
It is important to understand the document is completely blank at this stage. We call it a document stub.
- Click on the document title to open the toolbar, then click the Edit2 button. The document opens in a new window.
- Once this has opened you can see there is no Table of Contents or any content in the Editing panel of the document stub.
- You can directly close IGP:Writer using the browser window close button.
- Next we will add content to a document stub using the Import Document feature.
Importing a Wordprocessor Manuscript
A manuscript can only be added into an existing document or document stub. In the previous step you created a document stub. You can now import a manuscript.
You must have a Word doc file, or Open Document Format document already correctly styled. See the supplied tutorial document and other samples available at the bottom of this topic.
- If you haven't done so, first inspect the empty document.
- Click on the document title and click on Edit2.
- IGP:Writer will open in a new window. This takes just a few seconds.
Here you can see the document has nothing in the Table of Contents and nothing in the editing area. Close Writer by closing the Window.
It is now time to import a word processor manuscript file.
When importing a file you must navigate to its location on your local drive, set the format of the file being imported (wordprocessor is selected by default, and click the Import button.
Again, click on the document title. The document toolbar will open.
- This time, from the right hand side, click the More Tools button.
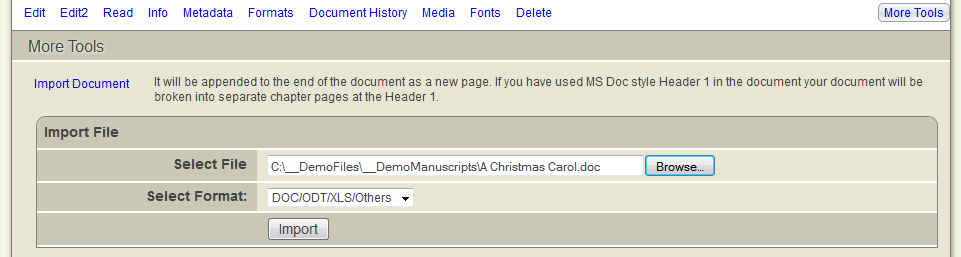
- Click on the Import Document button and the Import File dialog will open.
- Click the Browse button and navigate to the prepared document manuscript file. We have Siddhartha by Herman Hess prepared with structure styling and ready in Doc format for this tutorial.
- Next select the format of your imported file from the Dropdown Menu. Word processor files are set by default.
- Now click the Import button. Digital Publisher will start processing the manuscript. Depending on the size and number of sections, this can take from thirty seconds to minutes.
- When the import has finished, the dialog window will close on its own.
Now have a look at the imported document. Click on the document title to open the Document Toolbar.
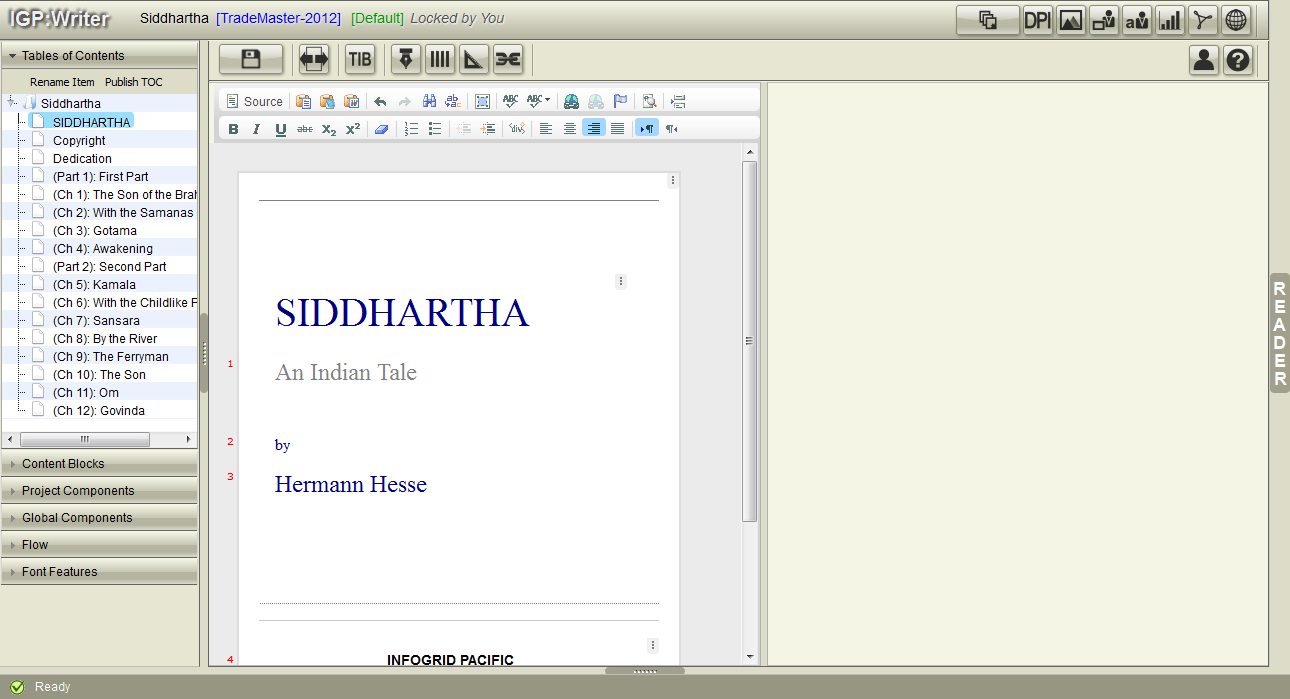
- Click the Edit2 button to open the document in Writer and here you can see the full document ready for work in the editing panel.
- There is a full Table of Contents. Click on the TOC items to navigate through the document. Each selected section will immediate open.
- The Writer window can be closed at any time. If you use the close window button, your work will be saved before the window closes.
That is the end of the Uploading a Manuscript tutorial. Thank you for watching.
Uploading Covers 
You may want to make your book look complete when you generate formats. That means a cover is required. The sample books have covers available.
You must upload a Cover to the included Media Manager and then it is instantly used for all format generation activities.
This tutorial contains eight frames.
This tutorial shows you how to upload a cover for e-books and RGB PDFs using the Media Manager upload forms. When you have completed the tutorial, you should immediately carry out the same actions using a training book.
Use the left and right arrows to navigate through the tutorial at your own pace. This tutorial should take less than 60 seconds to complete.
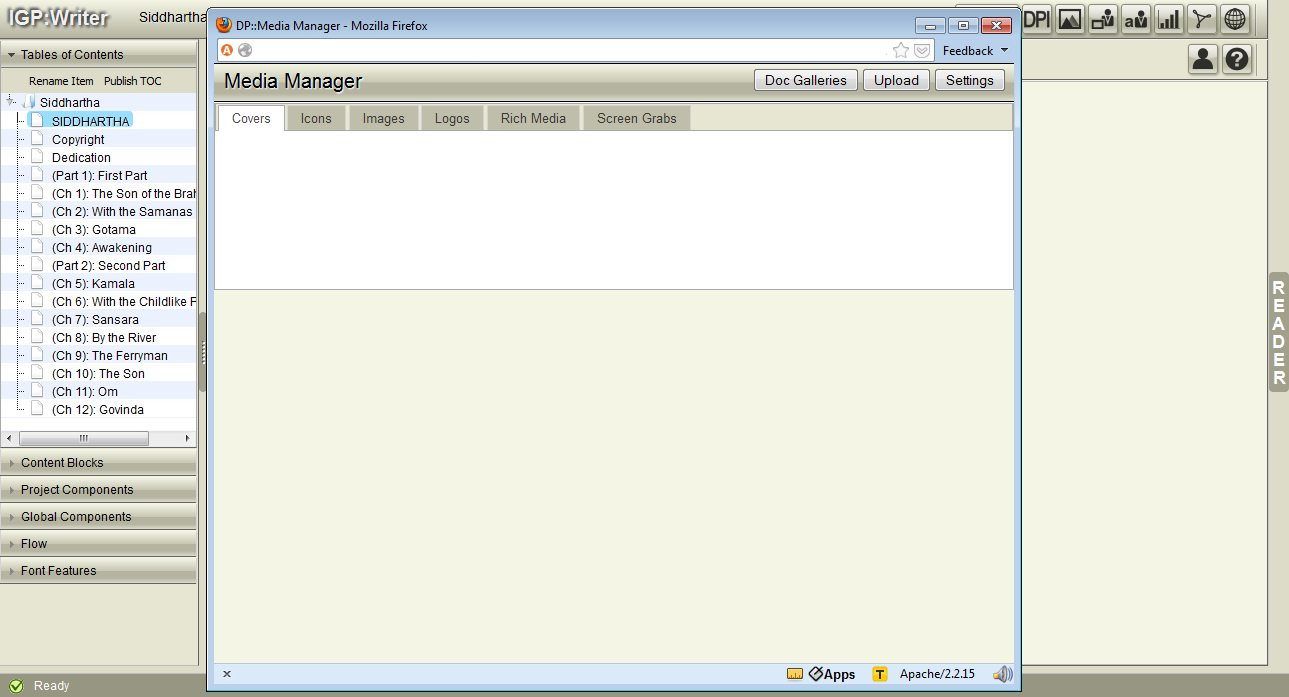
- From the Document Toolbar, click the Media Manager button. A new window will open. It will be empty in the first instance.
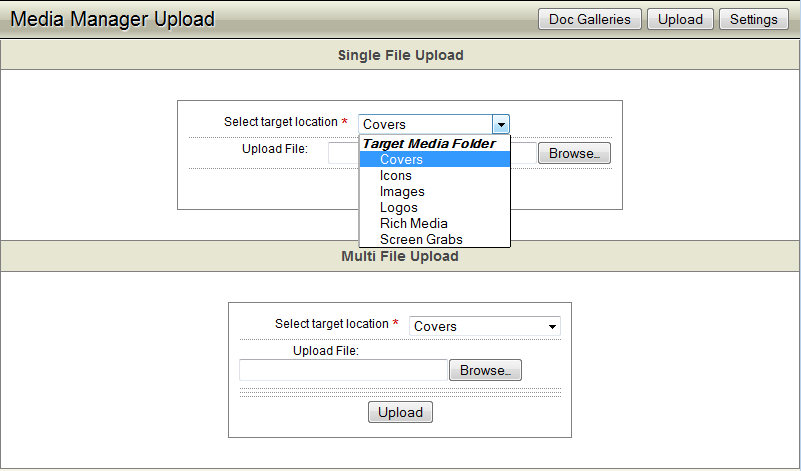
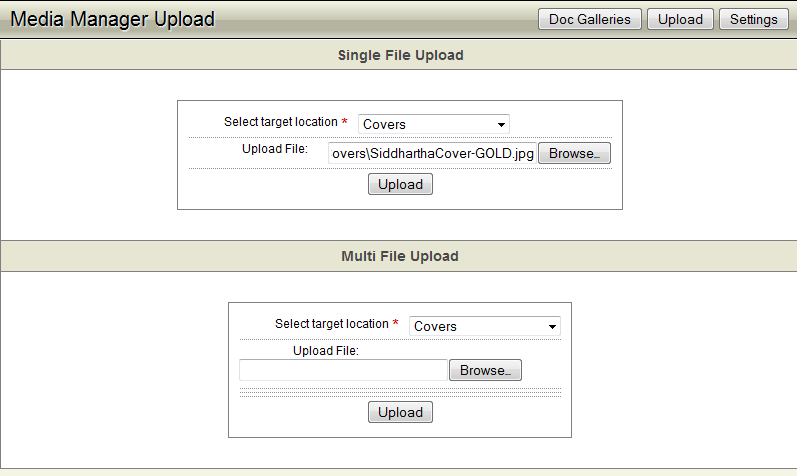
- From the Media Manager top toolbar, click the Upload button. The upload dialog will open.
- Covers is selected by default. Use the Single file upload, browse to the cover. Click the Upload button.
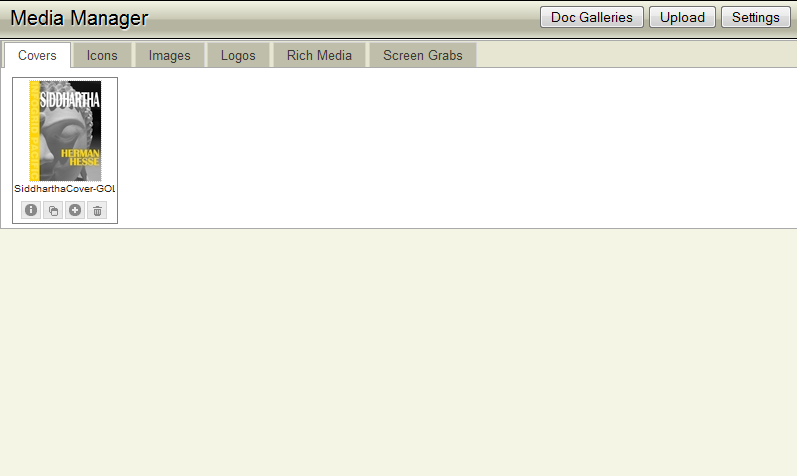
- When the file has finished uploading, click the Doc Gallerys button. This will open on the Cover Gallery and you will see a thumbnail of your cover there.
The cover is now available for the processors. Close the Media Manager window.
Adding Metadata 
To make your ePubs valid when you generate them you must have at least Title, Identifier, Language and Date in the metadata. Here is how to do it.
This tutorial contains five frames.
This tutorial shows you how to create the correct minimum required metadata for the production of a valid ePub2 or ePub3 format. When you have completed the tutorial, you should immediately carry out the same actions using a training book.
Use the left and right arrows to navigate through the tutorial at your own pace. This tutorial should take less than 60 seconds to complete.

This is the Document Processing Instructions (DPI) screen. It opens with metadata shown by default. To create a valid ePub you must include Title, Identifier, Language and Date
- From the Document Toolbar, click the DPI button. The DPI interface will open in a new window.
- By default this screen opens with metadata showing by default.
- Fill in your metadata. To create a valid ePub you must fill in Title, Identifier (ISBN), Language and Date.
- Title. The title of your book in plain english.
- Language. Use two language lowercase codes or language with locale attached in uppercase. Eg: en, en-UK, en-US, pt, pt-BR are all valid.
- Date. The date must be in ISO format. That is the pattern yyyy-mm-dd. You can use yyyy-mm and yyyy. No other pattern is valid. So it date will always look something like one of the following: 2012, 2010-07 and 2012-07-23.
- Identifier. For a finished book this will usually be an ISBN or ISSN number without hyphens. Temporarily you can use any valid alpha-numeric string with hyphens. Do not leave spaces or use dots. DP uses the identifier to generate the eBook filename. If you don't put anything into this field the filename will be NOID (No ID).
Effect of No Metadata
If you generate an ePub or Mobi file from Formats On Demand (FOD) without metadata the result will be an invalid file. When you created an ePub it is checked in the latest ePubCheck validator from the IDPF. If you book is valid you will see this in the Format Generation Information Dialog.
If your book is not valid you will see a cryptic report explaining what is wrong with the file.
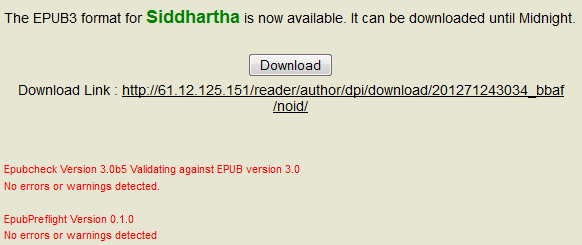
This is the ePub generation report you will see if your metadata is correct.
This is the ePub generation report you will see if you dont have correct metadata. In this case there is no language code (it may be different if there are more errors).
All you have to do is correct the metadata mistakes and generate the format again. If you have done other editing in the Writer document there may be other errors reported. Sometimes the error report is very big. Don't be intimidated. It can be because of just one simple thing rippling through the XHTML.
Generating Formats 
The last step is to generate your formats. Right now you can instantly generate a wide range of formats including:
- ePub2, ePub3+2 transitional
- ePub 3
- Kindle Mobi
- Print PDF with Crops, Crosses and slugs
- Print PDF trimmed
- RGB PDF trimmed.
Remember ePub must have the title, language and date metadata fields to be valid.
This tutorial contains six frames.
This tutorial shows you how to generate and view online and PDF formats from different locations on the interface. It also has a brief look at Formats on Demand.
All of these format generation and display tools help your productivity and quality during production of both the master FX, and the formats.
Use the left and right arrows to navigate through the tutorial at your own pace.
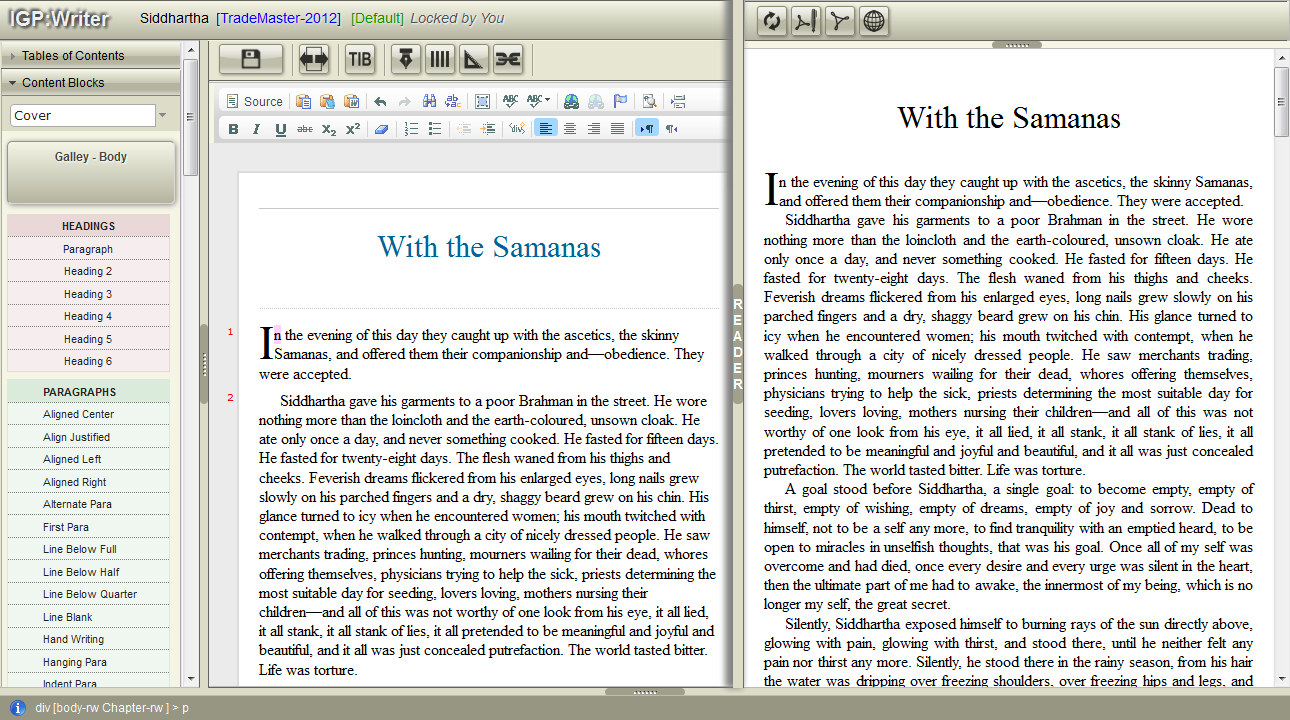
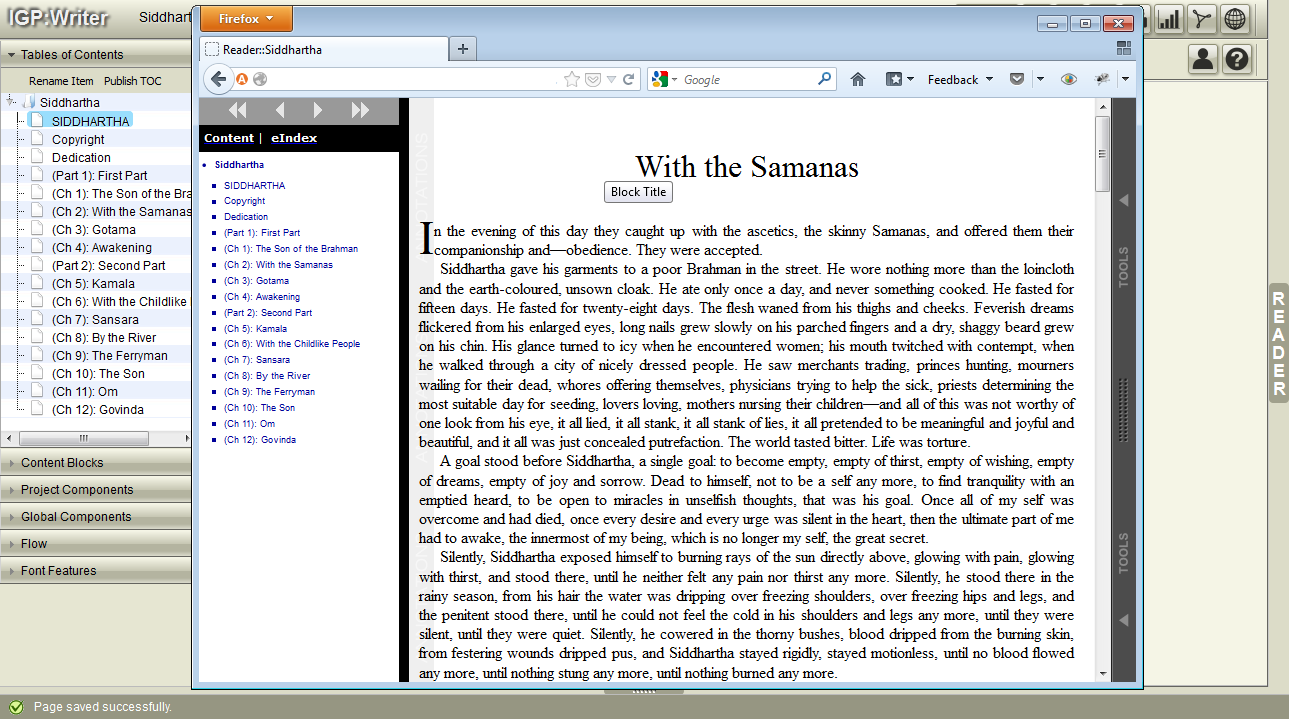
Reader Section Preview 

We are using the book Siddhartha in this demonstration.
- Navigate to a Chapter section using the Writer Table of Contents so you have a page full of content.
- Click on the Show/Hide Reader button, or on the Reader Panel-bar on the right side of the screen. The Reader will open.
- Click on the Online View button, wait a second the selected section will open in Reader view. This is the same as the e-book format view, taking into account various device limitations and presentation differences.
- If you navigate through the Writer Table of Contents, this view will be automatically updated to the current selected section.
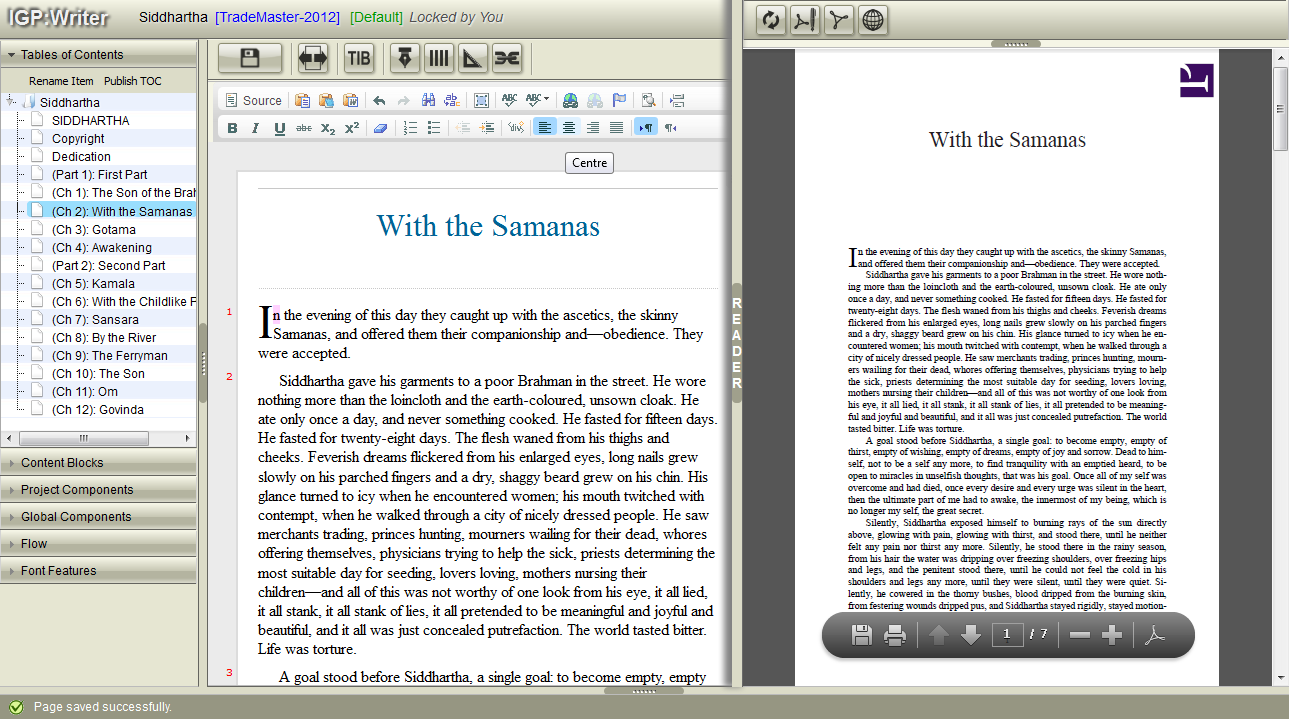
Reader PDF Preview 
- In the same Reader interface, click on the PDF button. Wait a few seconds and a Chapter PDF will be generated.
- You can navigate through the PDF and zoom depending on the capabilities of the PDF plugin for your platform.
- If you navigate in the Writer Table of Contents, this view will be automatically updated to the current section.
NOTE. This will work if you have a PDF plugin added to your browser. Different browsers and platforms have different plugins and third party applications. The Firefox Reader PDF plugin gives the most functionality. Google Chrome uses a custom PDF plugin with limited functionality for viewing the PDF, Safari is the same. On Mac you may have to install a third pary plugin for the PDF viewing to be really effective and productive.
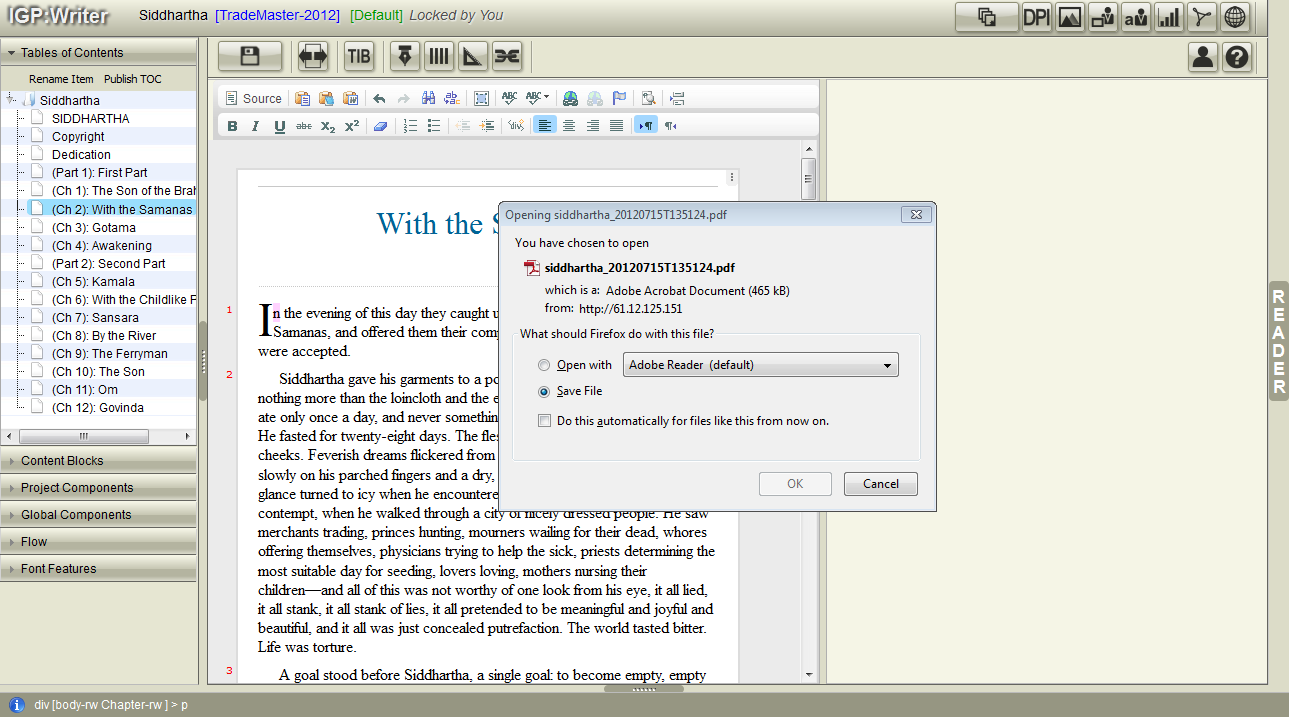
Preview Document PDF 
You can instantly generate a full PDF of the entire document. This will show running headers and footers.
From the Document Toolbar, click the Preview Document PDF button.

A new blank window will open while the PDF is being generated. Because this is a full book PDF, so depending on the book size this may take a few second to a minute or so.
You will see the browser download/open dialog when the PDF has been generated.
You can now open the PDF in Adobe Reader (assuming you have it installed) and move through the entire book.
Formats on Demand
To generate the full range of output ready formats you need to use Formats on Demand.
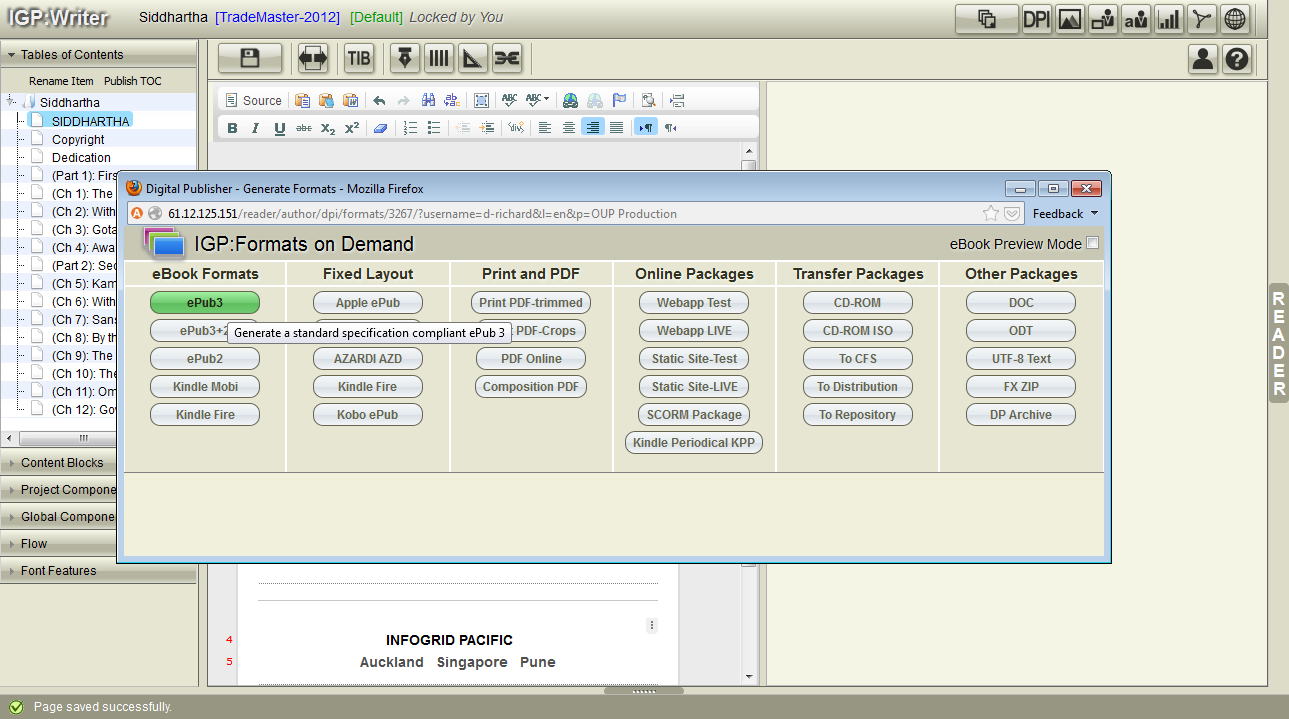
From the Document Toolbar, click on the Generate Formats button. The Formats on Demand interface will open.
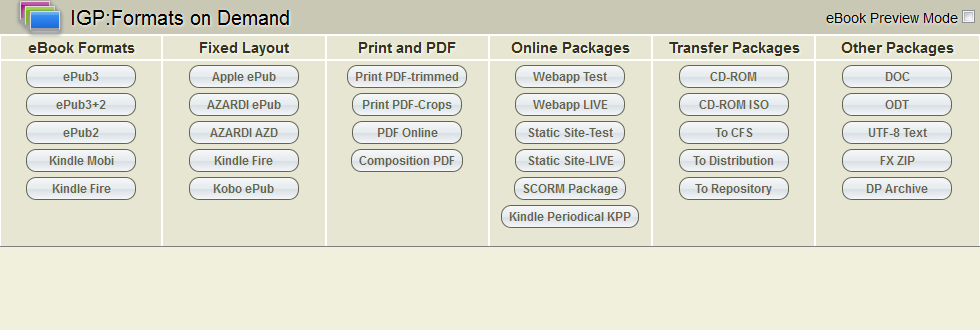
The Formats on Demand Interface shows you all the formats and packages that are available in IGP:Digital Publisher. Depending on your template some of the options will not be available.
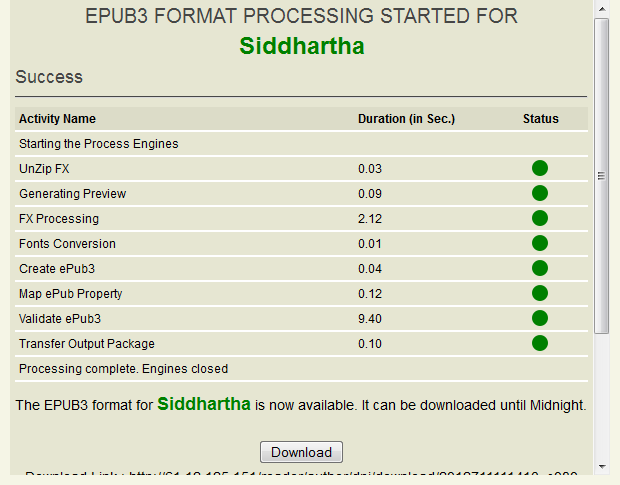
As your e-book formats are being generated you can see the various processing activities applied.
When you generate a format you will get an information dialog telling you what is happening with the generation of your format, and if you are in a processing queue.
ePub2
Click on the ePub2 button. The format generation Information Dialog will run. When the generation is complete you can download the file. Scroll down in the report interface and you can see any errors in your ePub. Because we have not yet put in the correct minimum required metadata,
epub3+2 Transitional
Click on the ePub3+2 button. The format generation Information Dialog will run. Transitional is a full ePub3 with ePub2 NCX and Guide included. It should work on all existing ePub2 players, but obviously cannot be used with ePub3 specific features.
ePub3
Click on the ePub3 button. The format generation Information Dialog will run. You will need an ePub3 Reader to open this correctly. Get AZARDI. The most comprehensive ePub3 reader available today. And it's free!
Kindle Mobi
Click on the Kindle Mobi button. The format generation Information Dialog will run. The generated file will be downloaded. There is also a processing log available.
Print PDF Trimmed
Click on the Print PDF-Trimmed button. There is no format generation dialog. Your PDF is being generated in the background. You will receive a download dialog when it is ready. This PDF is trimmed to the final print size. It can be used for proofing or reviews.
Print PDF Crops (Crosses and Slug)
Click on the Print PDF-(Crops) button. There is no format generation dialog. Your PDF is being generated in the background. You will receive a download dialog when it is ready. This is your PDF ready to send to the printer.
PDF Online
Click on the PDF-Online button. There is no format generation dialog. Your PDF is being generated in the background. You will receive a download dialog when it is ready. If a cover was uploaded it is inserted into the PDF. This PDF uses low resolution images and has
Composition PDF
Click on the Composition PDF button. There is no format generation dialog. Your PDF is being generated in the background. You will receive a download dialog when it is ready. The composition PDF is for final proofing operations. It has print resolution images, paragraphy numbers by section, crosses, crops and detailed slugs with section number, name, book-title and date information to make referencing easy.
It is probably best not to click on any of the other buttons until you have learned a little more.
Summary
If you have followed this tutorial through you now know how to:
- Create a Writer Document
- Upload a wordprocessor manuscript file
- Upload a cover
- Set the correct metadata for ePub generation
- Generate a wide range of formats including PDFs and a variety of e-books.
Topic Reference Documents
IGP-StructureStyling-Tutorial-Rev14.doc
This contains guide text that explains how to create your own manuscript on a section by section and block by block basis. This manuscript contains a lot of section types, blocks, lists, tables and poems.
A Christmas Carol.doc
Five easy and relatively short chapters. Charles Dicken's A Christmas Carol is a lightweight import and fun to read.
Download Cover (Right click and Save As)
HesseSiddhartha_Rev21-2016-01-21.doc
HesseSiddhartha_Rev21-2016-01-21.odt
Herman Hess's Siddhartha has two parts and twelve chapters so is a slightly more interesting book structurally. When you make your ePub format you will see the section nesting in the NCX (ePub2) and TOC.xhtml (ePub3).
Download Cover Image (Right click and Save As)
The Time Machine.doc
H.G.Wells' The Time Machine is another simple novel
Download Cover Image (Right click and Save As)
StylingWordTemplate.dot
This is a default MS Word document template with all the standard IGP Structure styles to allow new documents to be styled using IGP Structure Styles
StylingOpenDocumentTemplate.ott
This is a default Libre Office/Open Office document template with all the standard IGP Structure styles to allow new documents to be styled using IGP Structure Styles