LEARN@IGP
22
Design Profiles
Design profiles is a powerful tool that allows you to create multiple edition designs for print and e-books from a single FX document. Any editorial changes you make in your content are immediately reflected in all editions. Updated: 2012-07-27
Overview
Design Profiles make it quick and easy to create multiple print book editions and e-book variants from an IGP:Digital Publisher (DP) document. This means any editing changes that are made in the IGP:Writer editing file instantly reflect in all editions and formats.
A Design Profile is a presentation edition instance of any book or document that is in DP. A design profile allows edition and format specific CSS design plus section and block content customization exclusively for each Design Profile.
You can create and apply Design Profiles to the active document. While a Design Profile is selected, all formats generated will use that design profile.
This also applies to IGP:Formats on Demand (FOD) from the Management interface. Whichever Design Profile is applied in IGP:Writer will reflect in all FOD generated outputs.
CSS Profiles for design and layout
You can apply completely different CSS designs to each Design Profile you create. You can also copy an existing Design Profile to a new one if there are only a few style changes required.
For print that means page setup, fonts, size and flow can all be independently controlled by Design Profiles. Design Profiles also apply to IGP:Typography in the Browser (TIB). so you can make independent tracking changes for each print oriented Design Profile.
For reader formats different profiles can be used for different editions in different markets, and flow and fixed layout can be setup from the same book if the correct IGP:FoundationXHTML (FX) has been applied.
Section profiles for special edition content
Design Profiles allow the inclusion of "Profile Exclusive Include" sections. This makes managing product variations of frontmatter and specials pages easier.
Your different print editions (Hardcover, paperback, large print, etc.) can have different title pages, copyright pages, special inserts, previews; and anything else your editorial and marketing teams need to build your brand.
You can also define sections and blocks that only apply for reader formats. For example sections that have author interviews or other video and audio resources.
Layout Block Design Profiles
You can also wrap any content anywhere in a book with a Design Profile Layout Block and set the properties to the Design Profile you want.
Defined profiles
There is a set of 15 pre-defined Design Profiles to make production faster and easier. These are:
- Default. The start-up profile. Use this for simple single edition print books with single e-book editions.
- Hardcover. Defined for print hardcover editions. The reader CSS can also be used for a format variant.
- Trade Paperback. Defined for print
- Mass Market Large.
- Mass Market International Large
- Large Print
- E-Book1
- E-Book2
- E-Book3
- E-Book4
- Custom1
- Custom2
- Custom3
- Custom4
- Custom5
In this list the first five profiles are defined primarily for various print editions, the second four for e-books. and the final five are open.
Remember that the Document Toolbar at the top shows the Title (black), the template in use (blue) and the Design profile (green)
 Accessing Design Profiles
- From the Section Toolbar, click the Design Tools button to show the toolbar.
- Click the Design Profiles Button. The Design Profiles interface will open in the Tools Panel.
- There is a single profile Default displayed with a new document.
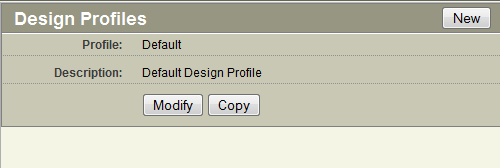
When you open Design Profiles the first time in any new document, you will see the single Default Profile only.
The actions you can carry out here are:
- Click the New button on the panel Toolbar to create a new Design Profile.
- Click the Copy button on the Default profile to create a new Design Profile
- Click Modify to change the description of the profile.
Create a new Design Profile
To create a new design profile click the New button on the Design Profiles Toobar. This will open a dialog with three simple form fields. Note that both Design Profile Name and Description are mandatory.
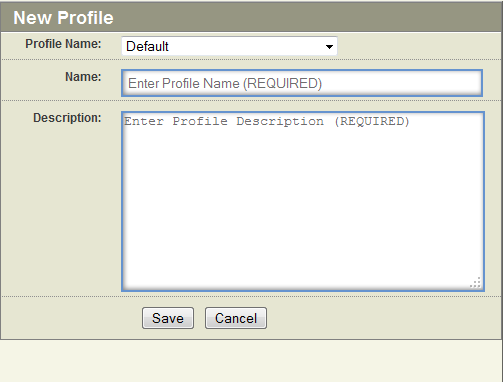
This is the new profile dialog. Here you can use teh Profile name selector, or you must define the name of the profile and provide a description.
You have two choices here:
- You can type in your own Design Profile name and description. This is OK if you are not inserting Profile Sections, or have a special custom requirement.
- You can use the pre-defined Design Profiles from the drop-down list. If you use this you can use the Profile Sections options automatically. This is the recommended approach.
From the Profile Name selector choose one of the predefined Design Profile names.

You can create your own named Design Profile, or use one of the Predefined names. Using the predefined names makes it easy to insert Design Profile Sections.
When you choose a named Design Profile and you insert Profile Sections into your document, the Sections are automatically processed when that Design Profile is active.
Include Profile Sections
You can insert any number of Design Profile named sections into your document. They will be included only in the Profile name to which they are set.
There is a special set of Section Templates for Frontmatter, Body, Backmatter and Specials. These have a Profile toolbar to allow you to apply the exclusive include Design Profile for a Section.
You can see these in the Section selector when you open the Insert Section dialog.
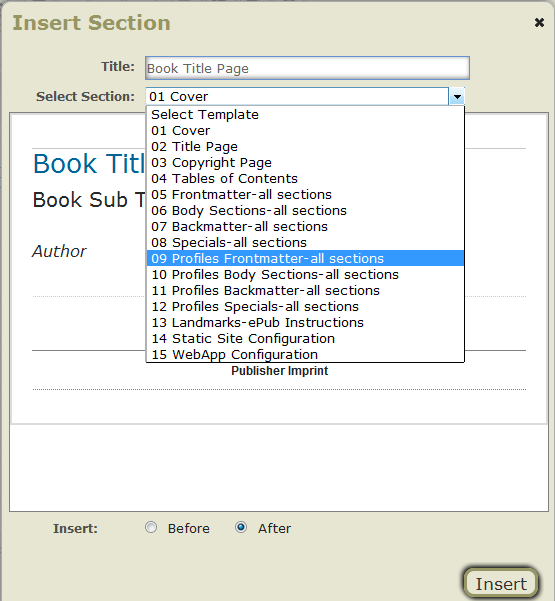
There are four defined Section templates for Design Profile Sections just under the highlighted line. This screengrab is from our development server so it has a few section options you may not see on your applications.
You are probably going to use Profiles-frontmatter and Profiles-Specials the most.
Insert the Profile Sections in the required locations just like normal Section inserts. .
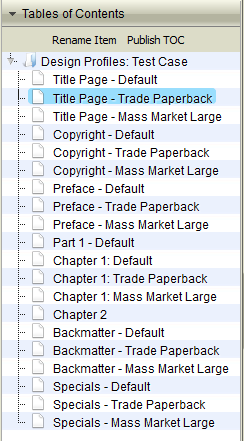
Here is the Table of Contents after a number of Profile Sections have been inserted. The sections have been labeled with their Design Profile names in the TOC for clarity.
On the right is a screengrab of a Table Of Contents with a number of Profile Sections inserted. You can see they have been named with their Section and Design Profile. It is your responsibility to make sure you name your pages so you can identify them in the Writer Table of Contents.
This screengrab has been taken from a development test book and it shows Design Profiles added to the body as well as frontmatter and backmatter. Design Profile sections in Body is probably not a real production requirement.
Table of Content Generation Issues
In the event you need to generate a Table of Contents which contains Design Profile sections you will have to manually edit the generated TOC pages.
Alternatively you can put in multiple Table of Content pages using Profile Sections, generate the TOCs and edit each one individually once.
Example
Let's assume you have three design profiles: Hardcover, Paperback and LargePrint. In each of these you have different AboutTheAuthor pages. These three sections are going to appear in the generated Table of Contents. However the requirement for a specific edition is you only want the appropriate AboutTheAuthor section to appear.
Create three Profile TOC pages and set them to each of the required Design Profiles.
From Document Processor, generate the required Tables of Content. you will now have three generated TOCs, one each for Hardcover, Paperback and LargePrint. All the these TOCs will have the three AboutTheAuthor pages listed.
Go to each of the Profile TOC pages and remove the two unwanted AboutTheAuthor entries. Save the pages.
If you regenerate TOC you will have to redo the editing.
For e-Book formats use the DPI Section Reordering option and select the Doc Excl (Document Exclude) for all sections other than the Default TOC.
Automation of Profile TOC generation is on the development map. However there are a large number of other considerations which must be addressed to make this reliable under all content combinations and for all formats.
Setting The Design Profile in the Section
Once you have inserted the correct Design Profile section into the Contents you need to select the Profile for which the page will be used.
Click on the Content Block tools button for the Section and you will see these options. In this case it is a frontmatter section.
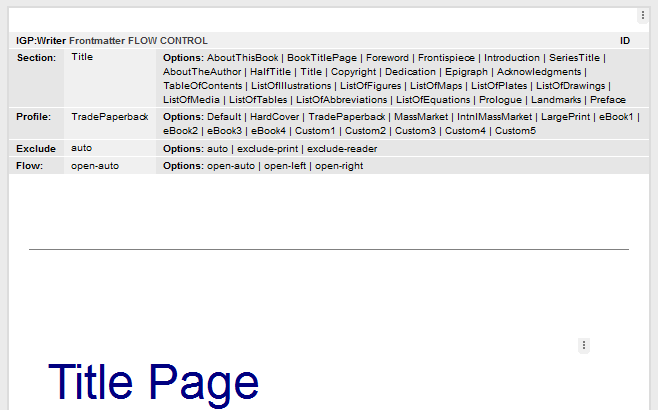
The Design Profile pages have an extra "Profile:" option bar. Use this to set
Here you can see the usual section options.
Profile Section template pages have an extra option toolbar that is only available in Profile Section templates.
- Select the correct Profile option for the page.
- You can still also access Exclude and Flow options if they are required.
- When you have finished setting the options, save the Section.
- You now have a Profile Section inserted and configured in your document.
Using Design Profile Blocks
You can wrap any content in a Design Profile Layout block. This enables you to use exclusive content and styling at the block level for different editions.
Example
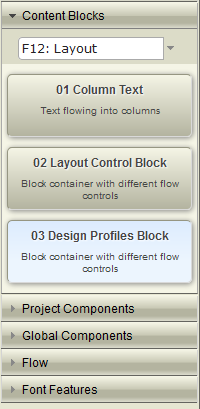
To apply a Design Profile Layout Block to any selected content, go to F12: Layout and double-click on 03 Design Profiles Block. The selected content will immediately be tagged with the layout control block.
Let's take a simple example and say you want to spread goodwill around and have different names and styles on the dedication page of each of the Default, Paperback and LargePrint editions.
- Insert a standard Dedication Section into you document.
- Enter your three dedications text entries.
- Select all of the text of the first entry.
- Open Content Blocks, select F12: Layout
- Double-click on the 03: Design Profiles Block button. Your text will immediately be tagged into a Design Profile Layout block.
- Next click on the Content Block Controls button to show the options.
- Select the required Design Profile. Close the block and save the section.
- Repeat this for the two following dedication paragraphs.
- The Section is immediately ready for format generation from each of the Design Profiles.
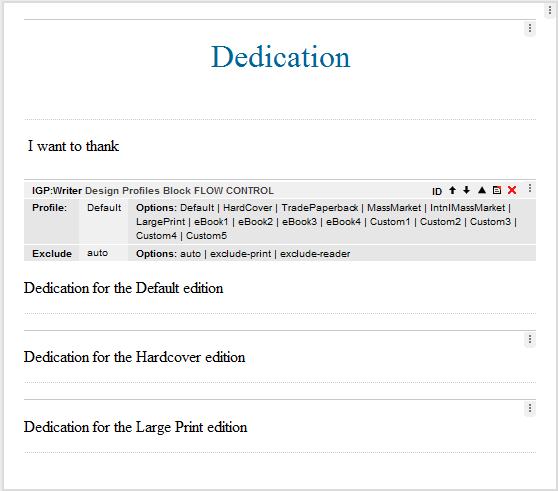
This is a view of the Writer edit panel where the three different dedication paragraphs have been wrapped with Design Profile Layout Blocks. The top block has the Content Block Controls open showing the Profile selection options. The title-block Dedication and text "I want to thank" will appear in all editions.
Remember any text on the page that is not in a Design Profile Layout Block will be visible in all editions.
Another effective use of Design Profile Layout Blocks is for the inclusion of rich media in your books where it is only available for e-book outputs. In this case the workflow would probably be:
- Carry out the book production using the Default Design Profile.
- When it is complete create a eBook1 Design Profile as a copy of the Default Design Profile. That means all the CSS and layout will be identical.
- Using the E-Book1 Design Profile, add Rich Media content anywhere you want it in your books. Wrap each Rich Media block with a Design Profile Layout Block and set the Design Profile to E-Book1
When you generate your ePub from the Default Design Profile, you will get a plain ePub with no rich media.
When you generate your ePub from the E-Book1 Design Profile, you will get the rich-media enhanced version.
Design Profiles in the DP Interface and Packages
Viewing your PDF
If you use the Preview Document PDF button from the Document Toolbar, you will see all of the Design Profile Sections and Design Profile Layout Blocks in your PDF.
To view the PDF with only the exclusive include Design Profile Sections/Blocks, you must use the PDF format buttons from the Formats On Demand (FOD) interface.
All four FOD PDF format options will generate the Design Profile specific PDF.
Viewing in Reader
When you view your document in Reader you will see all Design Profile Sections and Design Profile Layout Blocks in the Reader window.
To view the e-Books with only appropriate Design Profile Sections/Blocks, you must generate the format using the Formats On Demand (FOD) interface.
Your e-book output will reflect the content Sections and Blocks of your active Design Profile.
FX ZIP Package
When you create an FX Zip package all Design Profile information is included. The default CSS applied to the XHTML file will be the Reader CSS of the active Design Profile.
DP Archive Packages
When you create a DP Archive package all Design Profiles are included into the archive package and will be available in any other DP system when it is imported.