LEARN@IGP IGP:Writer
9
The Document Toolbar
Interface
The Document toolbar is located at the top-right of the interface. The following tools are available in the Document Toolbar.
- Insert Page
- Delete Page
- Show Delete Page history
- Document preview PDF
- View in reader
 Insert Page
Applicability: All output formats
The page concept is important to grasp. Within IGP:Digital Publisher a page is more like a website page than a printed page. If you are producing a Book, a chapter would logically be an IGP:Digital Publisher Page.
Page strategies are set-up in a document template. You can have any type of pages you need within a document template.
To Insert a new Page into the document
Applicability: All output formats
- If this is your first page the document Title will be highlighted in the Table of Contents (TOC).
- If your document already contains pages, click on the page you want to insert the new page before or after.
- Click Insert New Page.
- The New Page dialog will open.
- Click on the page template you wish to insert. You can click through the templates and see a preview of each page template.
- Select Add before or Add After as appropriate.
- Click Insert to complete the operations.
- Click Cancel and the dialog will close without inserting a new page.
- After a second or two, the Table of Contents (TOC) will refresh and your new page will be listed in the TOC and highlighted. The page work area will display the page.
 To Delete a Page from the Document
Applicability: All output formats
- You must be in Document Mode.
- Navigate to the page you wish to delete by clicking on it in the TOC.
- The page will display in the page work area.
- Click the Delete Page button.
- The application will give you are warning message "Are you sure" with the option to cancel.
- Click OK to immediately delete the Page. This action cannot be undone.
- Click Cancel to stop the page delete operation.
 To View Deleted Page History
Applicability: All output formats
Deleted page history is an audit trail showing you a record of all pages deleted during the life of a document. If any pages have been deleted the button icon will be red, otherwise it will be blue.
When you delete a page it is removed from the document and put in to the deleted page cooling zone. After 30 days the system will automatically remove the page permanently. Up until that time you can restore the page back into the document at any time.
When a page is deleted the entire revision history is lost and only the active page is put into the deleted page cooling zone.
No user can permanently delete a page away without it going through the system controlled cooling zone. This is to prevent page missing disasters; whether from speed, stupidity, or malice; in collaborative projects with multiple participants.
- Click on the Deleted Page History button. A report dialog will open.
- You can now view and review the deletion history.
- Items deleted more than 30 days will display only as report lines.
- Items deleted within 30 days will display Restore next to the report line.
- If you want to restore a page, and it has been deleted within the last 14 days, click Restore to move the page back into the document.
- The restored page will be appended to the end of the document.
- The original delete event will remain in place and the restore event will also be recorded.
 To Print to a Local Printer
Applicability: Print Output
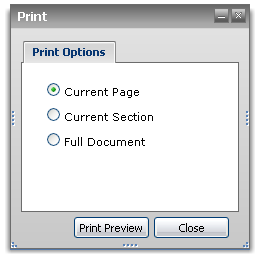
9-1 The local print dialog. You can choose to print the active page or the whole document.
You can print a document to a local printer without creating a PDF. Page formatting is your responsibility using your browser print setup tools.
- Click the Print button
- Select whether you want to print the active page, or the whole document.
- Click Print Preview to continue or Cancel to close the dialog without printing.
- On clicking Print Preview a new browser window will open showing you the print ready text. Note that it flows across the browser to the edges.
- Use your browser print configuration options to select page size, margins and header and footer options for your document.
- Use your browser print options to preview and print.
- You can use this option to save the document text open it in a text editor or similar. Note that this is generated from the active page data and will contain edit tool content that will display if you open the HTML file in Open Office, MS Word or other editor that does not have a high level of advanced CSS awareness.
 Single Click Document Preview PDF
Applicability: Print Output
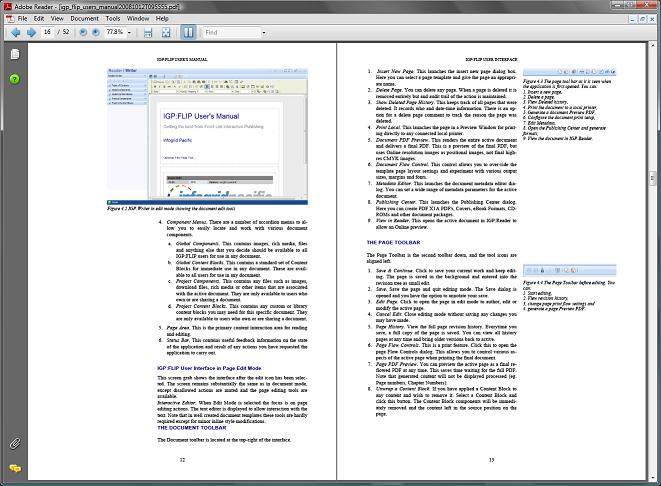
9-2 It is useful to set-up your PDF viewing application to double page so you can immediately see your page layout.
If you have the document rendering application installed, you can create a full preview PDF of the entire document with a single click. The PDF generated with this button is a production preview PDF and uses the low resolution graphics to conserve time and bandwidth. It is not the final production PDF which must be created from the Publishing Centre.
- Click on the PDF icon in the Document toolbar.
- A blank screen will open while the document is being prepared. This will close when the PDF is ready.
- The browser Save or Open file with... dialog box will appear. Select your option and view or save the PDF.
We recommend using the Open file with Adobe Reader option. It can be useful to have Adobe Reader set up so it opens in two page spread mode.
 View in Reader
You can view your document in IGP:Reader at any time. Make sure you have clicked Publish Reader Table of Contents in the Sidebar tools first.
When you click View in Reader, a new Window will open and the document will open at the title page. You can now use the IGP:Reader tools to annotate, bookmark, highlight, and remix the content without affecting the Writer document.