31
Manage Users
Main | Account Configuration | Manage Users
Add a new User
To Start
- From the Main Page, click the Account Configuration button.

- In the Manage Account page, click Manage Users.


To add a new User
- From the top right toolbar in the page, click Add User to
 add a new user.
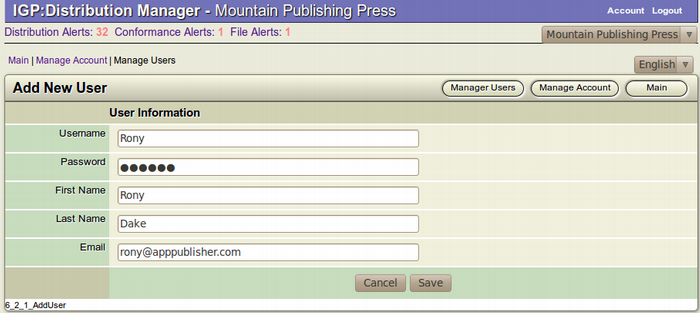
- The Add New User form will appear.
- Fill up the form and click Save to add the new user.

- Click Cancel to close the form and return to the previous
 page without adding a new user.
Details of the Add New User form

- Username: Assign a username for the new user you are adding. The username cannot have upper case letters or any special characters like @, #, $, % etc.
- Password: Supply a password for the username. You can change the password at any point of time. It is advised to make the password at least 5 characters long.
- First Name: Enter the First Name of the new user.
- Last Name: Enter the Last Name of the new user.
- Email: Enter the email ID of the new user.
Edit User Details
To Start
- From the Main Page, click the Account Configuration button.

-
In the Manage Account page, click Manage Users.


To Edit User Details
- The Manage Users' page displays the First Name, Last
 Name and Email ID of the list of existing Users.
- Browse for the User you want to edit.
- After finding the particular user you want to edit, click the
 Edit this User (Green) button from the Tools section of the channel. This square button has the Letter E inside it.
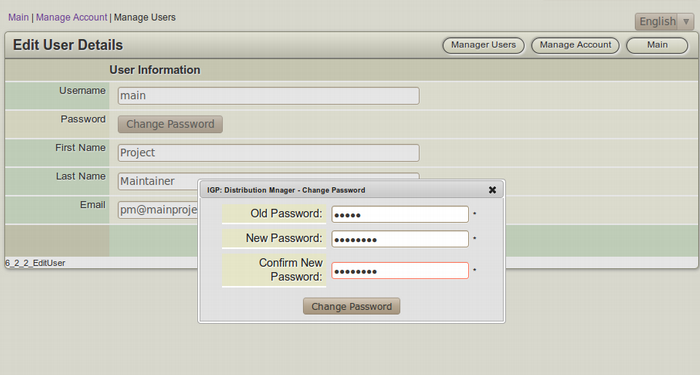
- The Edit User Details form will appear on the screen. This form is actually a filled-up Add New User form.
- Make the necessary modifications and click Save to edit
 the User Details .
- To close the form without editing the user details, click
 Cancel. This action will take you back to the Manage Users list page.
Delete a User
To Start
- From the Main Page, click the Account Configuration button.

-
In the Manage Account page, click Manage Users.


To Delete a User
- The Manage Users' page displays the First Name, Last
 Name and Email ID of the list of existing Users.
- Browse for the User you want to delete.
- After finding the particular user you want to delete, click
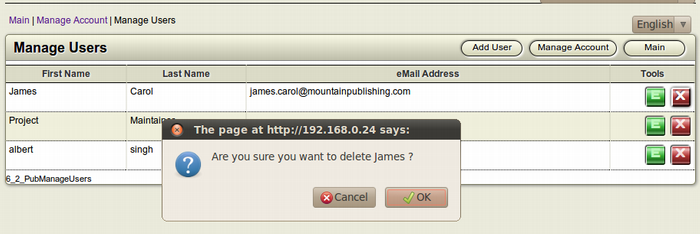
 Delete this User (Red) button from the Tools section of the channel. This square button has the Letter X inside it.
- The Confirmation Dialog Box will appear on your screen.
- To confirm the deletion of the user, click OK.
- If you don't want to delete the user, Click Cancel.
