LEARN@IGP
9
The Accordion menu
The IGP:Writer interface has a set of accordions on the left-hand side that allow detailed engagement with the content in a production context. This topic explains the purpose and use of the tools available include the Writer Table of Contents organizer/navigator, Content blocks for XHTML tagging, document component files, and font feature styles. Updated: 2012-07-26
Over View
There are a number of tool accordions available from the left panel. These are authoring, editing and tagging tools that you need to directly interact with the content while you work.
Accessing and using the Accordion Panel
The Accordions tools are available at all times.
To maximise screen editing room on smaller monitors, and to adjust your workspace to your preferences the Accordion panel can be easily opened and closed.
The accordions are in a collapsible, resizable panel. You can close the accordion panel if you need more editing space.
The accordion panel has two open modes - Push, and Overlap.
Click on the Panel Sidebar button to open and close the panel using push mode. The panel will stay locked in the position you set.
Click anywhere else on the Panel Sidebar to open the panel in temporary overlap mode. When you remove your mouse from the panel it will automatically close.
You can change the width of the Sidebar to any required width. Use the Border Sidebar and drag it left and right to a suitable width. The Sidebar will remain at the size you set it until you change it, or close the editor. This may be useful if you have long TOC Item titles.
The Interface
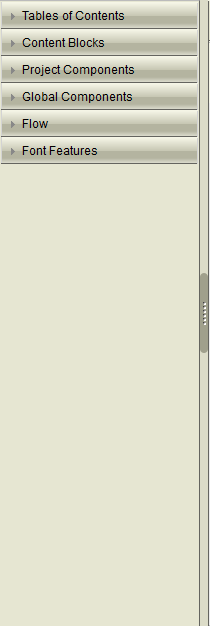
The Accordion side panel with all accordions closed
Currently there are six accordions on the panel. They are:
- Table of Contents: Click the accordion bar to show the Table of Contents.
- Content Blocks: Click the accordion bar to show the tagging Content Block tools.
- Project Components: Click the accordion bar to open and access the project components. This means all files being used in the document such as images, uploaded files and rich media.
- Global Components: Click the accordion bar to open and access the Global Components. This means files that can be accessed and used in all documents.
- Flow: Click to access the basic flow controlling tools. (This accordion may be decremented in a future release.)
- Font Features. Click the accordion bar to open and access the Font Features styles. This is an experimental feature.
Table of Contents (TOC)
To view and interact with the Table of Contents, click on the Table of Contents Accordion Bar. It will immediately expand. Click it again to close the Table of Contents.
The TOC contains a list of all the Sections in your current document in the sequence they will be produced. Click on any Section to navigate directly to it.
If you have not saved a section and you navigate, the application will give a Save
Renaming TOC Items
You can rename a TOC section item at any time.
- Navigate to the TOC Section you want to rename.
- Click on Rename Item. A dialog will open.
- Key in the new section name and click OK.
- The Section will be renamed.
WARNING. At this stage the section has only be renamed in the interface. You must click Publish TOC to send the new name to the server.
Rearranging TOC Sections
You can reorder the TOC section items by dragging and dropping items.
- Hold Mouse down on the item you want to move.
- Drag it up or down into the new position. Watch for the green "tick mark" that indicates you can drop the item into a position.
- Release the mouse button.
WARNING: When you have rearranged the TOC you MUST click Publish TOC to send your rearrangement to the server. If you do not, the next time you do a save or reload the document it will be back in the previous sequence.
Content Blocks
Content Blocks is a large library of pre-design XHTML tagging blocks covering nearly every requirement for a wide range of documents.
FX tagging is a very large subject and covered in more detail in its own Topic.
The Content Block tools allow you to tag content with Blocks, Headings, styled, semantic and processing instruction paragraphs, and styled, semantic and processing instruction inline styles.
- Headings: Place the cursor inside a paragraph or another heading (h1 to h6). From the HEADING tagging options click on another Heading to convert it to the required type.
- Paragraph: Place the cursor inside a paragraph , list item, or table cell to apply a class selector using the PARAGRAPH tools. Click on a Paragraph Selector. The selector is applied. Click on the paragraph again and you can see the applied selector in the Statusbar at the bottom. You can place the cursor inside a paragraph and click the same selector to remove it. This operation acts like a toggle.
- Inline: Select some text. Click on an INLINE selector. The selected text is immediately wrapped using that selector. Put your cursor into the newly tagged inline content and you will be able to see the selector in the Statusbar.
Context Sensitive Operation
For digital content to be of future value it is essential that content is tagged correctly and accurately. To assist in this Content blocks has a context sensitive mode that indicates which tagging patterns can be added, and in what FX named block context.
To turn Context Sensitive tagging on, from Editing tools, click Content Blocks to ON. Now the available tags in the Content Block selector menu will change if your cursor is moved into different blocks.
3. Project Components
Project Components is direct file access to all the assets used in the document. It shows all files, even those uploaded through Media Manager. Needless to say you should only make changes here if you know what you are doing.
Project Components Toolbar
- Upload: Click the button to upload images, media or any other items of a specific book.
- Refresh: Click the button to refresh and update the various components of the given folders after an upload or delete action.
- Delete: Click the button to delete any items from the list of Project Components. Select the item that you want to delete and click the Delete button. The file will be immediately removed.
- Download: Select a file and click the Download button. You will receive the standard browser download dialog to save it to the location of your choice. .
4. Global Components
Global Components are images available to every book and may be useful for managing graphics and other files that may be included in multiple documents.
Global Components are common for all documents whereas Project components are only for a specific document.
These are organised by media genre:
- Logos: You can use this directory to store standard business and imprint logos, banners, and other items that are used regularly in documents. Remember to store everything in both online and print resolution using *_print.* and *_online.* as the filename pattern. .
- Icons: If you have standard icons that are used repeatedly in different documents, this is the place to store them so all authors and editors can access them at any time. The default installation comes with a collection of around 50 icons which you can use, or delete and replace with your own. If you make your own icons, remember to create print and online resolution images.
- Default Images: This directory allows you to store a collection of regularly used images. The default one-drop.jpg image is stored here by default, plus a number of other useful items. You can store any images you like here.
- Download Files: This directory is designed for the storage of regularly used downloads. They can be any format: PDF, presentations, documents, etc. When you are using IGP:Digital Publisher to create online content you can immediately incorporate these into your Web page. These files are not of any use in a print document and cannot be included into the print output.
- Rich Media: This directory is designed for the storage of regularly used rich media components like video files, audio files and ShockWave Flash.
Global Components Toolbar
- Upload: Click the button to upload images, media or any other items which may come in use in majority of documents.
- Refresh: Click the button to refresh and update the various components of the given folders.
- Delete: Click the button to delete any items from the list of Global Components. You should first select the item that you want to delete.
- Download: Click the button to download any item from Project Components into your local system. You should select the item first before downloading.
5. Flow
The flow accordion gives a basic set of flow control characters and tags you can use to control your content behaviour.
The list of options available in the Flow Accordion menu are:
- Print Insertion Point: This tool is used to insert a print insertion point. This allows an image to be moved to a particular off-set location in your PDF outputs.
- Insert Soft Hyphen: This tool controls the hyphenation of a word if it occurs at the end of a line. To insert Soft Hyphen, place the cursor at the correct hyphenation point in the word and then click the button. A word with a soft-hyphen will not be hyphenated at any other point.
- Insert Non-Break Space: Sometimes you want words to stay together in the same line without breaking. This tool prevents a line from breaking between two words. To insert a Non-Break Space, remove the existing soft-space, place the cursor between the two particular words and then click the button.
- Insert Zero-Width Space: This tool is used to force a line to break at a particular point without hyphenation even when there is no space in the text. Place the cursor where you want and click the Zero Width Space button. At present this only works for print output.
- Insert Thin Space: This tool allows a thin space to be inserted between words, or words and punctuation. . To insert a thin space between two words, place the cursor between them and click the Thin Space button.
- No Hyphenation: Sometimes an important word should not be hyphenated if it occurs at the end of a line. To prevent a word from being hyphenated, highlight the word and then click the No Hyphenation button.
Font Features
This is an experimental feature pending the development of a more comprehensive Design Profile specific feature.
Font features only works for OTF fonts. It does not work for TTF fonts at all.
Font Features is an inline style-type interface only at present. Therefore you must use it the same way as tagging Inline Styles.
Select some text and click on the required font feature.
If the text already has an inline style applied the font-feature element will be added.
For more information on Font Features see the IGP:Font Manager 2 User Manual.