LEARN@IGP IGP:Digital Publisher Management
4
Private Documents
Main | Account User | Private Documents
- Private Documents
- Add a new Document
- To Start
- To add a new document
- Details of the Add New Document form
- Document and Metadata field form
- Template Configuration
- Import an archive document
- To Start
- To import an archive document
- Activate the Options Bar of a document
- To Start
- To activate the Options Bar of a document
- Options and Functions
- Edit
- Read
- Info
- Metadata
- Formats
- Document History
- Media
- Delete
- More Tools
Private Documents
Every user in all accounts has private documents. This is for creation, editing and management of documents that are not required to be shared in a project.
For example within a workflow context users can move a document to their private account while they have editing rights and no other users can modify the document.
Whenever a user creates a new document or copies an existing document from a Project or the Account Library, it is created in the users Private Document ares.
NOTE: Account Administration can view and manage User Private documents from the Administration Library area. Documents are not private in a personal privacy context.
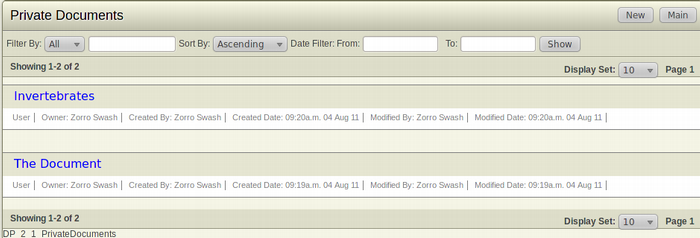
When the Account User clicks on Private Documents,a new screen opens showing a list of documents with a filter bar and page navigation options.
On the top bar there is a New Document button.
An Account User can create a document at any time. When a document is created it is mapped into the Account User Collection and also into the Account Master Collection and Maintenance Master Collection.
Add a new Document
To Start
- From the Main Interface, click Private Documents under the Account User section. This action will open the Private Documents Screen.
- The first time this is opened the screen will be blank and there will be no documents.
- The Private Documents Screen displays the list of documents that the Account User owns along with a short description and detail of each.
To add a new document
- From the top right toolbar, click New to add a new document.
- The Add New Document form will appear.
- Fill in the blank fields.
- Click OK to add the new document.
- To return to the previous page without adding the new document, click Private Document from the top right toolbar. This action will take you back to the Private Documents page.
Details of the Add New Document form
Document and Metadata field form
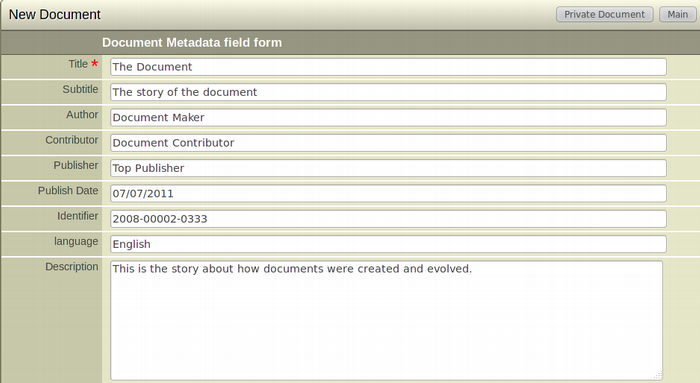
- Title:(Mandatory) Enter a title for the document.
- Subtitle: Enter the subtitle of the document.
- Author: Enter the author of the document.
- Contributor: Enter the name of the person who contributed in the creation of the document.
- Publisher: Enter the name of the publisher of the document.
- Publish Date: Enter the publish date for the document. As this is a front-list production environment this may be now, in the future or a marketing release date.
- Identifier: Enter an identifier for the document.
- Language: From the Dropdown menu, select the language medium of the document.
- Description: Enter a short description about the document.
Template Configuration

- Presentation Template: From the Dropdown Menu, select the Presentation Template for the document to be created.
- Document Template: From the Dropdown button, select the Document Template for the document to be created.
Import an archive document

To Start
- From the Main Page, click Private Documents under the Account User section. This action will transfer you to the Private Documents Screen.
- The Private Documents Screen displays the list of documents that the Account User owns along with a short description and detail of each.
- The archive document (ZIP) should be in your local system.
To import an archive document
- From the top right toolbar, click New to import an archive package.
- The Add New Document form will appear.
- Click the Browse button in the Import Digital Publisher Archive Document section.
- Search for the Digital Publisher archive document in your local system and select it. Click OK to import the document to your Private Document list.
- The archive document will be a part of the private document of the Account User.
Activate the Options Bar of a document
To Start
- From the Main Page, click Private Documents under the Account User section. This action will transfer you to the Private Documents Screen.
- The Private Documents Screen displays the list of documents that the Account User owns along with a short description and detail of each.
To activate the Options Bar of a document
- Browse for the document you want to view the Option bar of.
- After finding the particular document, click on the title of the document.
- The Option Bar of the document will appear below the Project name.
- The list of Options are:
Edit | Read | Info | Metadata | Formats | Document History | Media | More Tools
Options and Functions
Edit
When an Account User clicks the Edit option, the application opens the particular dcocument in IGP:Writer in a new window. You can do all your editing here.
Read
When an Account User clicks the Read option, the application opens the particular document in IGP:Reader in a new window.
Info
When an Account User clicks the Info option, the interface expands with an Ajax call to show the metadata of the document. Here you can edit the metadata of the document.
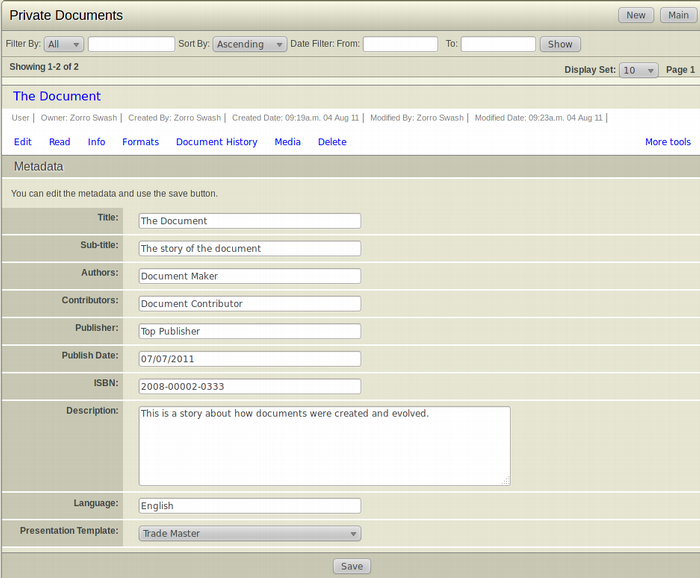
Metadata
When an Account User clicks the Metadata option, the application opens the Document Processing Set-up form of the particular document. The Document Processing Set-up form contains a list of Processing options divided into various sections.
Formats
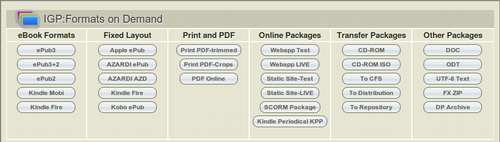
When an Account User clicks the Formats option, the interface expands with an Ajax call to show the generate format options. The formats option is detailed separately as it is shared between IGP:Writer and this interface. Click on the type of the format to download the document in that particular format.
Document History
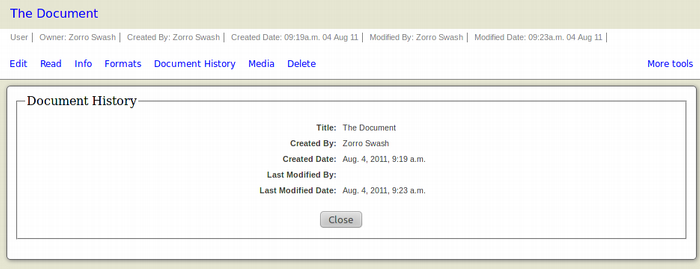
When an Account User clicks the Document History option, the edit document history of the particular document opens. This shows the details of the document history by document section showing who made any editing changes and at what date and time.
Media
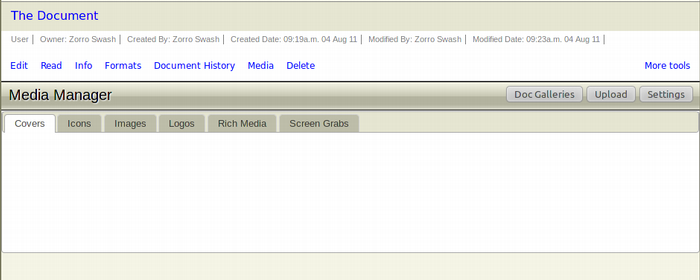
When an Account user clicks the Media button, the interface expands with an Ajax call to launch the Media Manager window. Media Manager is where you maintain and access images, graphics and other media used in the particular document.
Delete
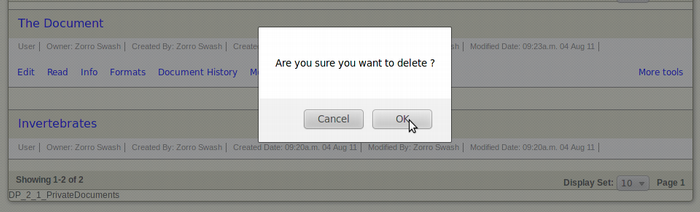
When an Account User clicks the Delete option, the document is deleted from the list of Private documents of the Account User. This deleted document is moved to the Delete Library section under the control of the Account Admin. The transfer of the deleted document to the Delete Library acts like a catch basket if the document is deleted by mistake and needs to be recovered.
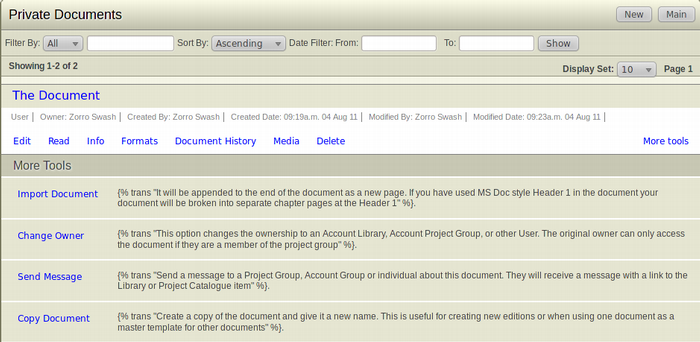
More Tools
More tools provide with various options regarding the control and manipulation of the document. The options are:
- Import Document: When an Account User clicks Import Document, the document is appended to end of a document as a new page.
- Change Owner: The ownership of a document can be transferred to an Account Library, an Account Project Group or another Account User. When a document owner clicks the Change Owner button, a dropdown menu will appear. Select the new owner of the document and click OK. If it is an Account User, click Account User from the dropdown menu, an entry field will appear on the right. Start typing the name of the Account User. Different Account Usernames will appear relevant to the letters you type. Select the Account User of your choice and click OK.
- Copy Document: This option helps in creating a copy of the document. This is useful for creating new editions or when using one document as a master template for other documents.