LEARN@IGP IGP:Distribution Manager

29
Right Profiles
Main | Global Tools | Right Profiles
- Add a Rights Profile
- To Start
- To add a Rights Profile
- Details of the Add Rights Profile form
- Add a Rights Profile to your Rights List
- To Start
- To add a Rights Profile to your Rights List
- Modify a Rights Profile
- To Start
- To Modify a Rights Profile
- Delete a Rights Profile
- To Start
- To Delete a Rights Profile
The system provides the ability to create country Rights Profiles which can then be made available and assigned to individual books.
Add a Rights Profile
To Start
- From the Main Page, click the Global Tools button.

- In the Global Tools page, click Right Profiles.

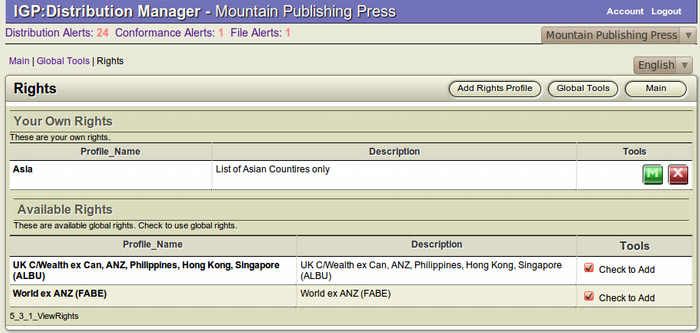
- The View Rights page showing the list of available as well as your own Rights will appear on the screen.
To add a Rights Profile
- From the top right toolbar in the View Rights page, click onAdd Rights Profile to add a new Rights Profile.
- The Add Rights Profile form will appear.

- Fill up the form and click Save to add the new Rights profile.

- Click Cancel to close the form without adding a new
 channel and return to the previous page.
Details of the Add Rights Profile form
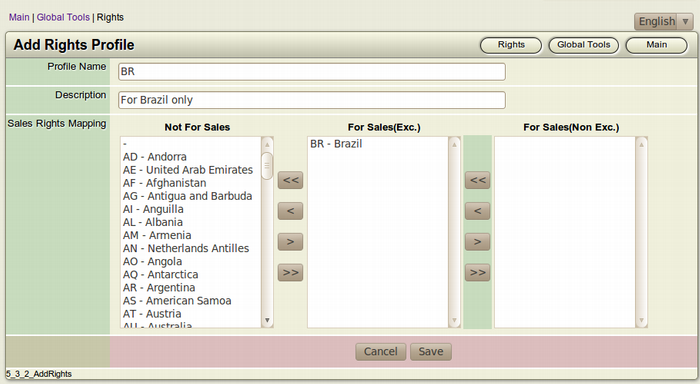
- Profile name: (Mandatory) Assign a name for your new Rights Profile. It is advised to name it according to the country where the future books going to be assigned to the profile has a Sales Right. eg. India Only, Germany Only etc.
- Description: (Mandatory) Here, you can elaborate the profile by stating where the Sales Right are going to be. eg. For Sale in India/Germany only etc.
-
Sales Right mapping: (Mandatory) The Selection Editor contains the Sales Rights Mapping for the new profile. The Selection Editor is divided into 3 sections. Move the countries to the specific section with the help of the Move Arrows.
- Not For Sales: Not for sale in the specified countries
- For Sales (Exc): For sale with exclusive rights in the specified countries or territories (sales restriction applies)
- For Sales (Non Exc.): For sale with non-exclusive rights in the specified countries or territories (sales restriction applies)
Add a Rights Profile to your Rights List
To Start
- From the Main Page, click the Global Tools button.
- In the Global Tools page, click Right Profiles.
- The View Rights page showing the list of available as well as your own Rights will appear on the screen.
To add a Rights Profile to your Rights List
- From the list of Available Rights, browse for the profile you want to add to your Rights List.
- Select the Rights profile you want to add to your Rights list
 by selecting the respective checkbox of the profile. The checkbox is located in the Toolbar section of each profile.
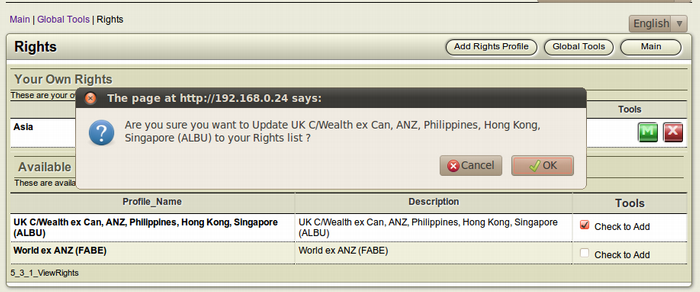
- A Confirmation Dialogue Box will appear on the screen.
- Click OK to confirm the addition of the profile to your Rights List.
- Click Cancel to quit the operation without adding the Rights Profile to your Rights List.
Modify a Rights Profile
To Start
- From the Main Page, click the Global Tools button.
- In the Global Tools page, click Right Profiles.
- The View Rights page showing the list of available as well as your own Rights will appear on the screen.
To Modify a Rights Profile
- Browse for the Rights Profile you want to modify.
- After finding the particular profile you want to modify, click
 the Edit this Rights Profile (Green) button from the Tools section of the channel. This square button has the Letter M inside it.
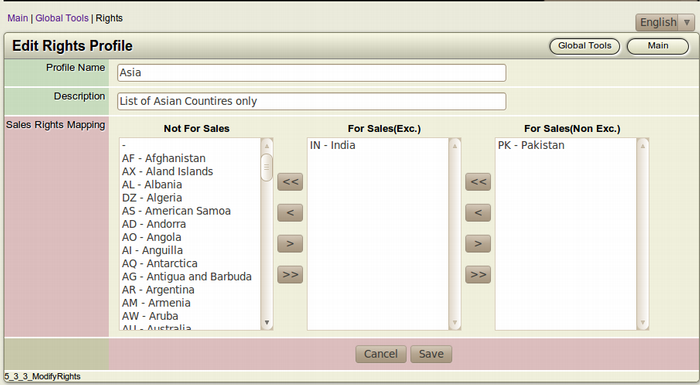
- The Edit Rights Profile form will appear on the screen. This form is actually a filled-up Add Rights Profile form.
- Make the necessary modifications you want and click Saveto edit the Rights Profile.
- To close the form without editing the profile, click Cancel. This action will take you back to the Rights Profiles list page.
Delete a Rights Profile
To Start
- From the Main Page, click the Global Tools button.
- In the Global Tools page, click Right Profiles.
- The View Rights page showing the list of available as well as your own Rights will appear on the screen.
To Delete a Rights Profile
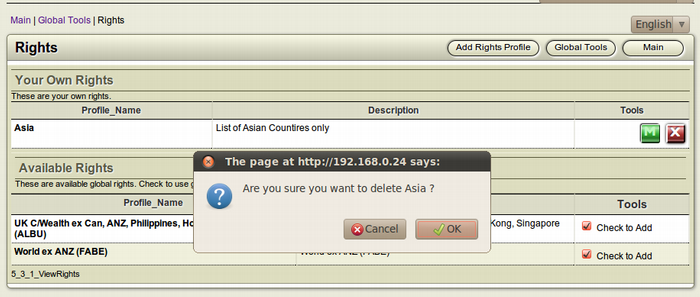
- Browse for the Rights Profile you want to delete.
- After finding the particular profile you want to delete, click
 the Delete this Rights Profile (Red) button from the Tools section of the profile. This square button has the Letter X inside it.
- The Confirmation Dialog Box will appear on your screen.
- To confirm the deletion of the profile, click OK.
- If you don't want to delete the profile, Click Cancel.