LEARN@IGP IGP:Distribution Manager

34
Distribution Channels
Main | Maintenance | Distribution Channels
- Add a new Distribution Channel
- To Start
- To add a new Distribution Channel
- Details of the Add New Channel form
- Distribution Channel
- Add Channel Currencies
- Distribution Channel Partner Address
- Distribution Channel Partner Contact
- Edit a Distribution Channel
- To Start
- To edit a Distribution Channel
- Delete a Distribution Channel
- To Start
- To delete a Distribution Channel, follow the steps given below.
- Distribution Channel - Apple
- Set Currency for Apple
The Distribution Channel maintenance helps in the creation of a new distribution channel as well as in the modification of existing ones.
The Distribution Channel will be available to all Publishers from their Global Tools Distribution Channels configuration menu.
Add a new Distribution Channel
To Start
- You must have maintainer privileges to add a new Distribution channel.
- You must open the Maintenance page.
- From the Main Page, click the Maintenance button.

- In the Maintenance page, click Distribution Channels.
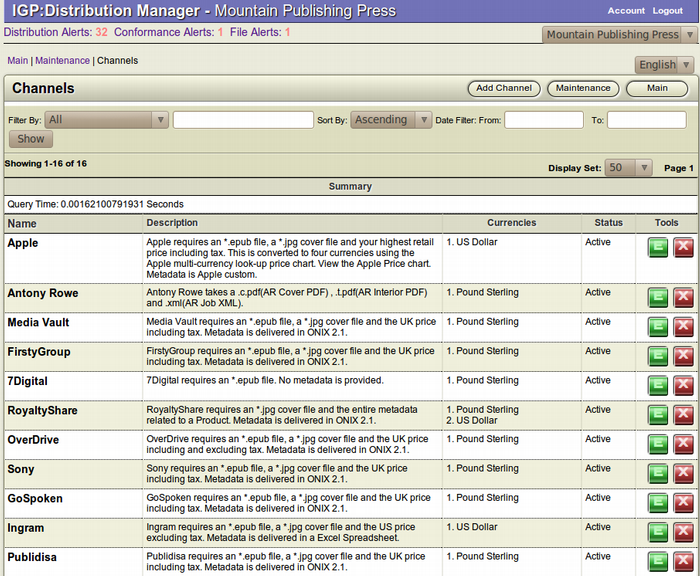
 This action will transfer you to the Distribution Channels Screen.
- The Distribution Channels Screen displays the list of existing Distribution Channels along with a short description and detail of each.
To add a new Distribution Channel
- From the top right toolbar in the page, click Add Channel
 to add a new Distribution Channel.
- The Add New Channel form will appear.
- Fill in the various field of the form and click Save to add the
 new Distribution Channel.
- Click Cancel to close the form without adding a new
 channel and return to the previous page.
Details of the Add New Channel form
Highlighted fields are mandatory fields. If you leave a highlighted field, then the Distribution Channel will not be created. A Dialogue Box will appear asking you to fill up all the mandatory fields.
The Screengrab of the form has been divided into segments.
Distribution Channel
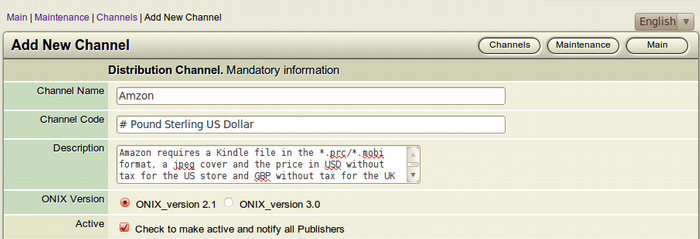
- Channel Name: (Mandatory) Fill in the name of the Distributor in the blank field. Eg. Athena
-
Description: (Mandatory) Here you can fill up with any description you want. but it is advised to filled up with the various details of the distributor.
Eg. Athena requires an *.epub file, a *.jpg cover file and the UK price including tax. Metadata is delivered in ONIX 2.1. - ONIX Version: (Mandatory) Fill the ONIX Version you are using for distribution of Books and Serials. It can be ONIX 2.1 or the new upgraded ONIX 3.0
- Active: Check the Box, if you want to make the Channel active as well as notify all the Publishers.
Add Channel Currencies
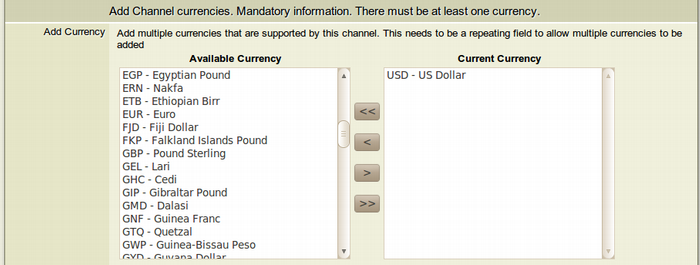
Select the currency you want for automatic channel price calculation from the Currency Selection Editor. Highlight the currency you want to select in the Available Currency window and move it to the Current Currency window with the help of the Move Arrow. You can select multiple currencies for a single Distribution Channel.
You cannot add a new channel without assigning a currency to the channel. This is a mandatory field.
Distribution Channel Partner Address
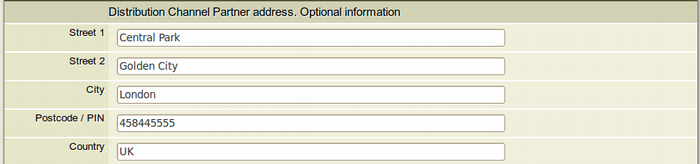
This is an optional field. Fill it up with the Address of the Distribution partner, if there is any.
- Street 1: Enter the Address of the Channel Partner.
- Street 2: Enter the Address of the Channel Partner.
- City: Enter the city of the Channel Partner.
- Pin: Enter the Postal Code of the area where the Channel Partner is based.
- Country: Enter the country of the Channel Partner.
Distribution Channel Partner Contact
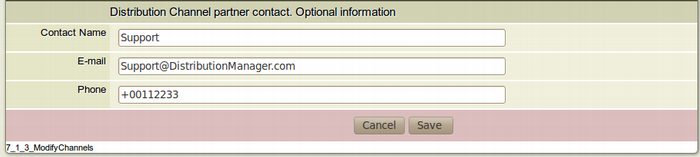
This is an optional field. Fill it up with the Contact Details of the Distribution partner, if there is any.
- Contact Name: Enter the name of the Channel Partner.
- Email: Enter the email ID of the Channel Partner.
- Phone: Enter the phone number of the Channel Partner.
Edit a Distribution Channel
To Start
- You must have maintainer privileges to edit a Distribution channel.
- You must open the Maintenance page.
- From the Main Page, click the Maintenance button.
- In the Maintenance page, click Distribution Channels. This action will transfer you to the Distribution Channels Screen.
- The Distribution Channels Screen displays the list of existing Distribution Channels along with a short description and detail of each.
To edit a Distribution Channel
- Browse for the Distribution Channel you want to modify.
- After finding the particular channel you want to modify, click
 the Edit this Channel (Green) button from the Tools section of the channel. This square button has the Letter E inside it.
- The Edit Channel Information form will appear on the screen. this form is actually a filled-up Add New Channel form.
- Make the necessary modifications and click Save to edit the Distribution Channel.
- To close the form without editing the channel, click Cancel. This action will take you back to the Channels' list page.
Delete a Distribution Channel
Firstly, it is recommended not to delete any Distribution Channel. It is better to keep a Channel Inactive by unchecking the Active Box in the Edit Channel Information form than deleting the Distribution Channel completely. Delete only when you are absolutely sure that the particular channel will not be of any use in the future.
To Start
- You must have maintainer privileges to delete a Distribution channel.
- You must open the Maintenance page.
- From the Main Page, click the Maintenance button.
- In the Maintenance page, click Distribution Channels. This action will transfer you to the Distribution Channels Screen.
-
The Distribution Channels Screen displays the list of existing Distribution Channels along with a short description and detail of each.
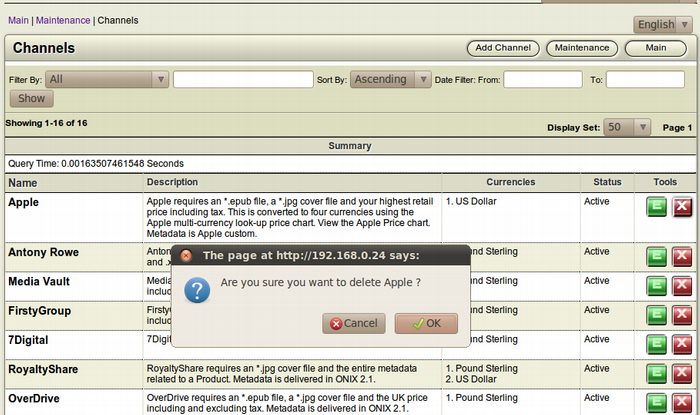
To delete a Distribution Channel, follow the steps given below.
- Browse for the Distribution Channel you want to Delete.
- After finding the particular channel you want to delete, click
 the Delete this Channel (Red) button from the Tools section of the channel. This square button has the Letter X inside it.
- The Confirmation Dialog Box will appear on your screen.
- To confirm the deletion of the channel, click OK.
- If you don't want to delete the channel, Click Cancel.

Warning: You cannot recover a Distribution Channel once it is deleted. So, proceed with caution when it comes to deleting a channel.
Distribution Channel - Apple
Apple is a channel that supports pricing in the following currencies only:
- USD (US Dollar)
- CAD (Canadian Dollar)
- EUR (Euro)
- GBP (UK Pound)
- AUD (Australian Dollar)
Also, the Price value provided for any/all of the above currencies must match a single tier in the Apple Price Tier, else Apple would reject the distributed package.
Hence, its important that the right Currency is mapped and the right Price conversion rules are assigned to this Channel.
Before you can start using Apple as a Channel, the following must be considered and executed:
Set Currency for Apple
- A single currency should be mapped to the Apple channel.
- If your Base Currency is one of the 5 prices supported by Apple, set it as the channel currency for Apple.
- If your Base Currency is not one of the 5 prices supported by Apple, set one of the currencies as the channel currency for Apple. USD is recommended.
- See section Distribution Channels - Pricing for rules on configuring the Channel-Pricing for Apple.