AZARDI:Content Fulfilment User Manual
32
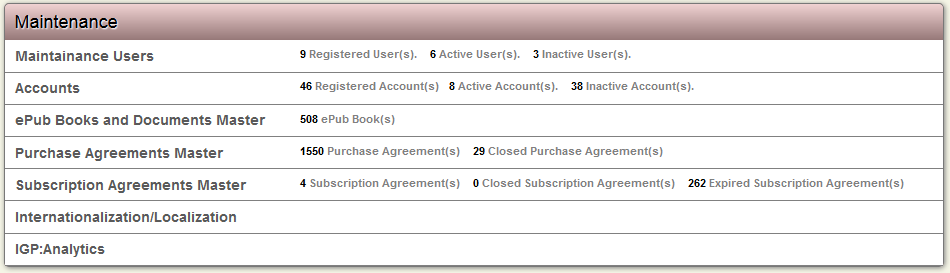
Account
Overview
The Accounts interface is used to view the list of all the accounts created. The Accounts interface can be further used to create, modify, maintain and delete accounts.
New Account
1. You must have maintainer privileges to create a new Account.
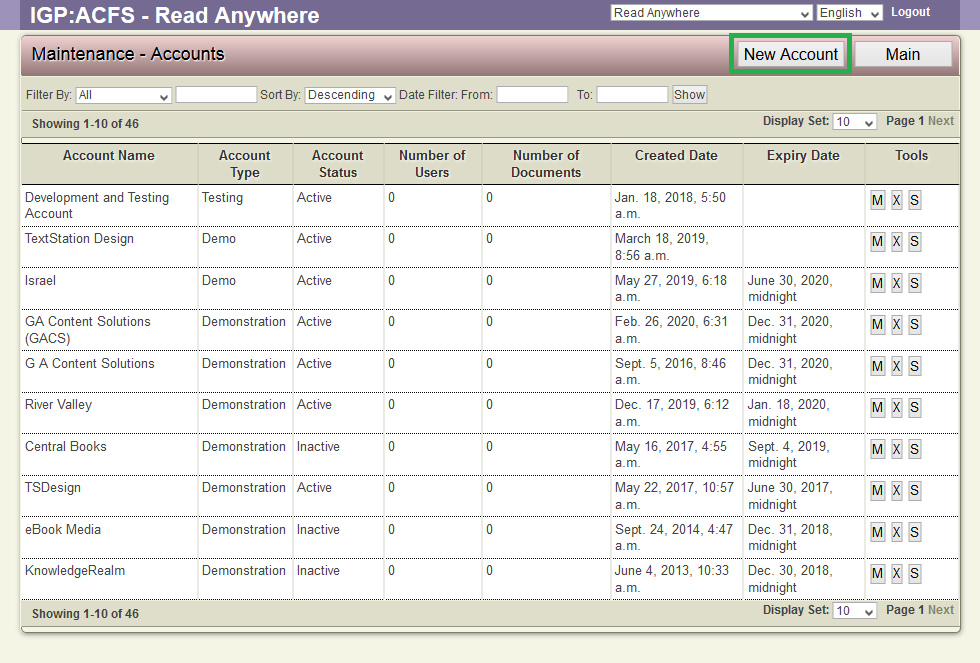
2. From the Main Page, click Accounts under the Maintenance section. This action will transfer you to the Accounts Screen.
3. The Accounts Screen displays a list of existing accounts along with detail of each.
4. From the top right toolbar in the page, click New Account to create a new account.
5. The Add New Account form will appear. The fields with red asterisks are mandatory.
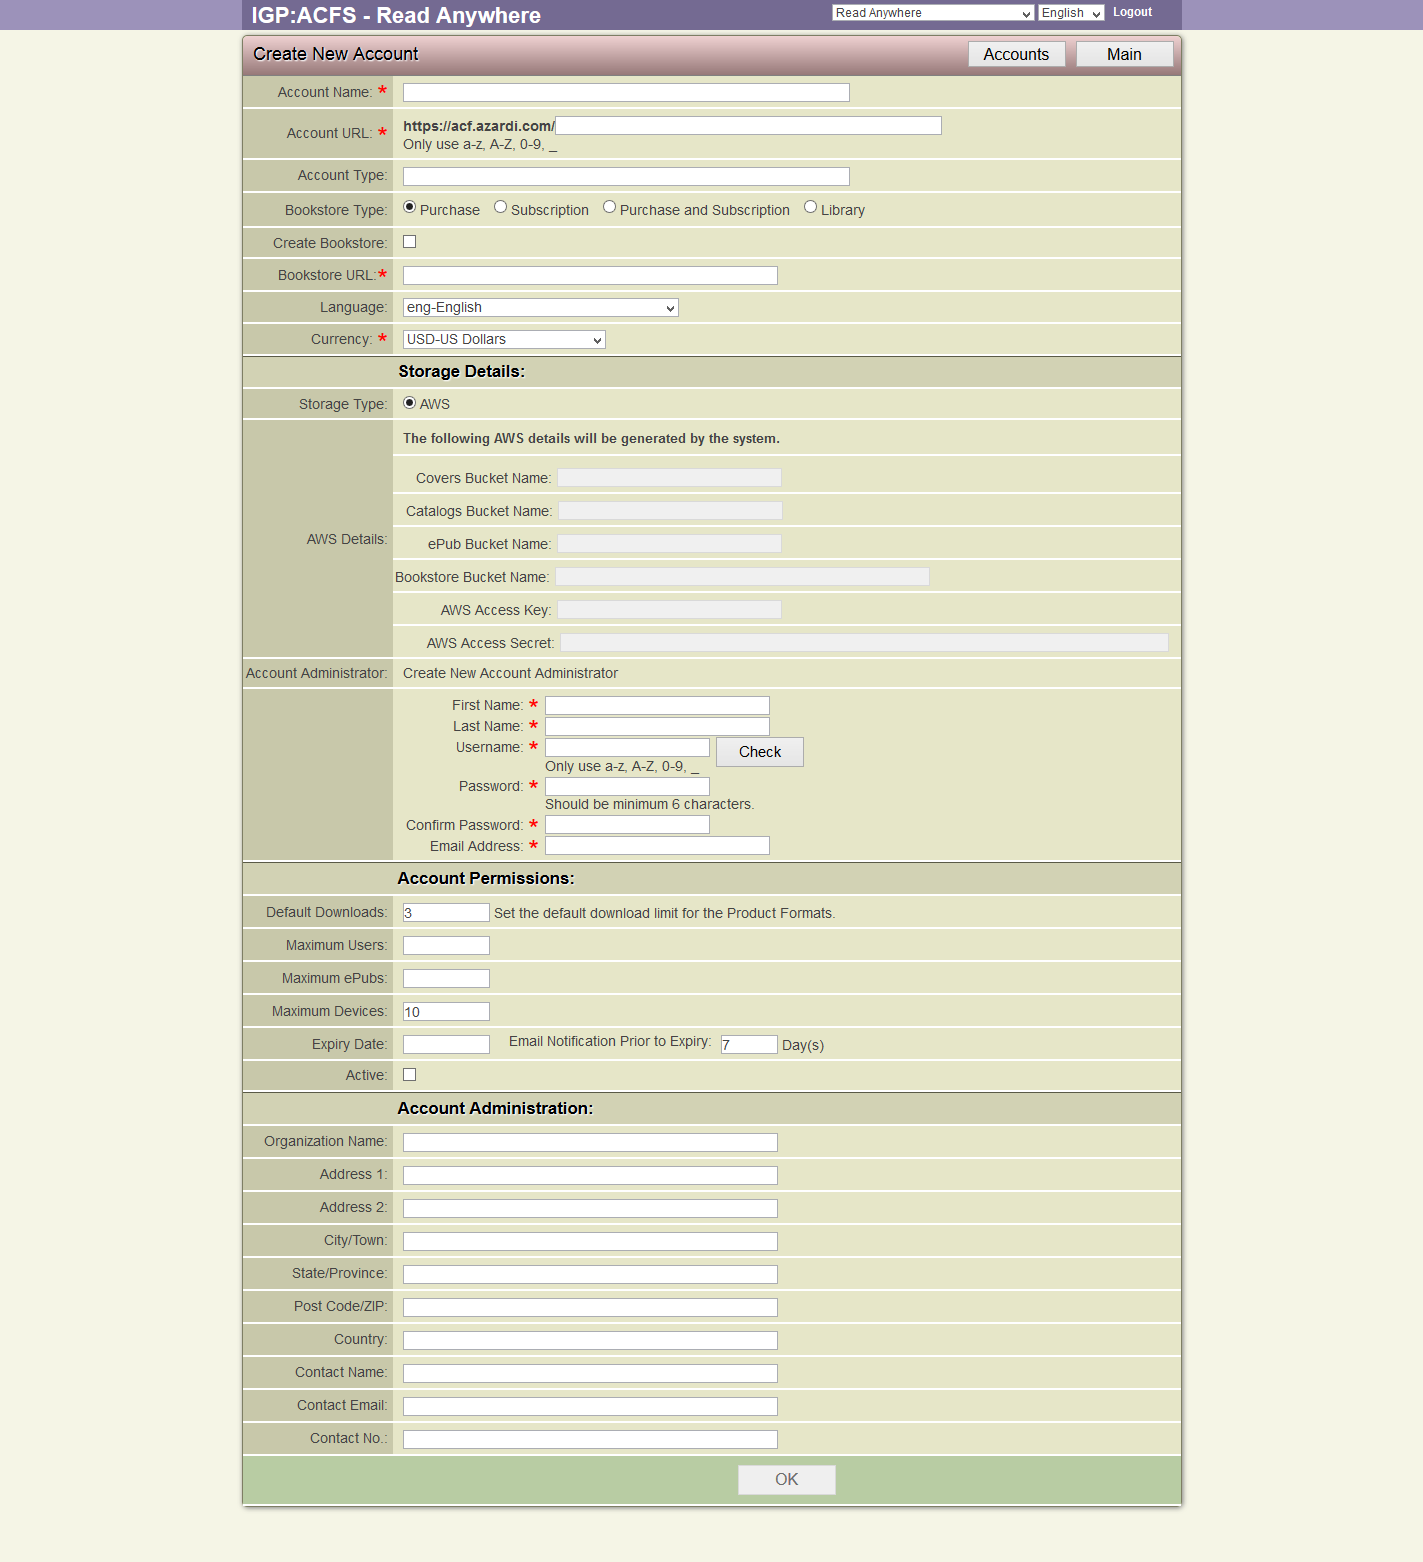
1. Account Name: Enter an account name for the Organisation. e.g. Infogrid Pacific
2. Account URL: Enter an account url for the Organisation. This will be based on the base URL of the site plus an account extension e.g. https:www.igp.mycompany.com/account/
3. Account Type: Enter the type of account. e.g. Demonstration, Commercial etc.
4. Bookstore Type: Select the type of bookstore based on the orgazisation business requirements.
5. Create Bookstore: Select this checkbox, if you want to go with the default bookstore created by ACF.
6. Bookstore URL: This will auto populate the Bookstore URL, once the Create Bookstore checkbox is selected.
7. Language: Select the required Language to be set for the Account.
8. Currency: Select the required Currency to be set for the Account.
9. Storage Type: The Storage Type selection by default is Server. The fields against Server Details are greyed out and none of these fields have to be filled when setting up a new account. Once an account is created the server details will be automatically updated by the system. The maintainer can click the Modify option to check these details for an existing account.
10. Account Administrator: To create a account administrator, you must enter the details in the fields.
11. Default Downloads: Enter the number of downloads for a format for the Account. Leave the field value Blank for unlimited users and downloads.
12. Maximum Users: Enter the number of admin users who can access and have the privilege to upload epubs and modify library catalogs, EPUB metadata and range of all other options. Leave the field value Blank for unlimited users.
13. Maximum ePubs: Enter the number of EPUBs that can be uploaded and stored in the account. Leave the field value Blank for unlimited users.
14. Maximum Devices: Sets the number of devices, for a specific customer, of the Account. Leave the field value Blank for unlimited user devices.
15. Expiry Date: Expiry date can be assigned to an account. Leave the field value Blank for unlimited access.
16. Email Notification Prior to Expiry: Day(s) can be set, as to how many days before and after account expiry, the admin gets email notifications.
17. Active: Active checkbox should be selected while creating account to make account active.
18. Organization Name: Enter the name of the organization for which the Account is being created.
19. Address 1: Enter the address of the organization.
20. Address 2: Enter the address of the organization.
21. City/Town: Enter the name of the city or the town where the organization is located.
22. State/Province: Enter the state or the province where the organization is located.
23. Post Code/ZIP: Enter the postal code of the region where the organization is located.
24. Country: Enter the country where the organization is located.
25. Contact Name: Enter the name of the person to contact on behalf of the organization.
26. Contact Email: Enter the email address of the contact person, on behalf of the organization.
27. Contact No.: Enter the contact number of the person to contact on behalf of the organization.
6. Once all the necessary mandatory fields of the form are filled, then click OK to create the new account.
The Tools for Account
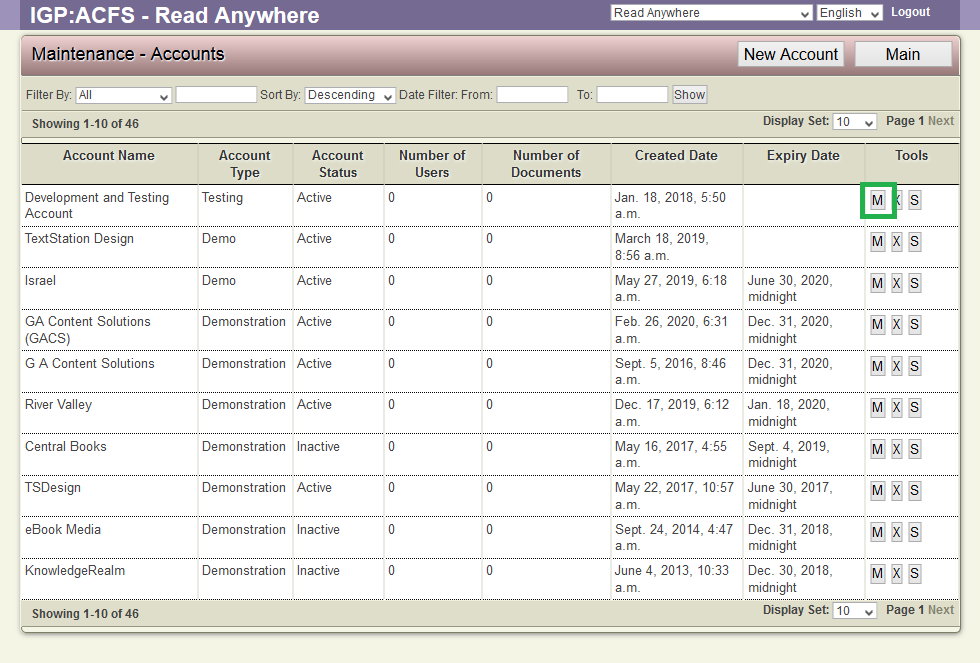
Against each Account the following tools will be available
Modify
1. Browse for the account you want to modify.
2. After finding the particular account you want to modify, click the Modify this Account button from Tools section of the account. This square button has the letter M inside it.
3. The Modify Account form will appear on the screen. This form is actually a filled-up Create New Account form.
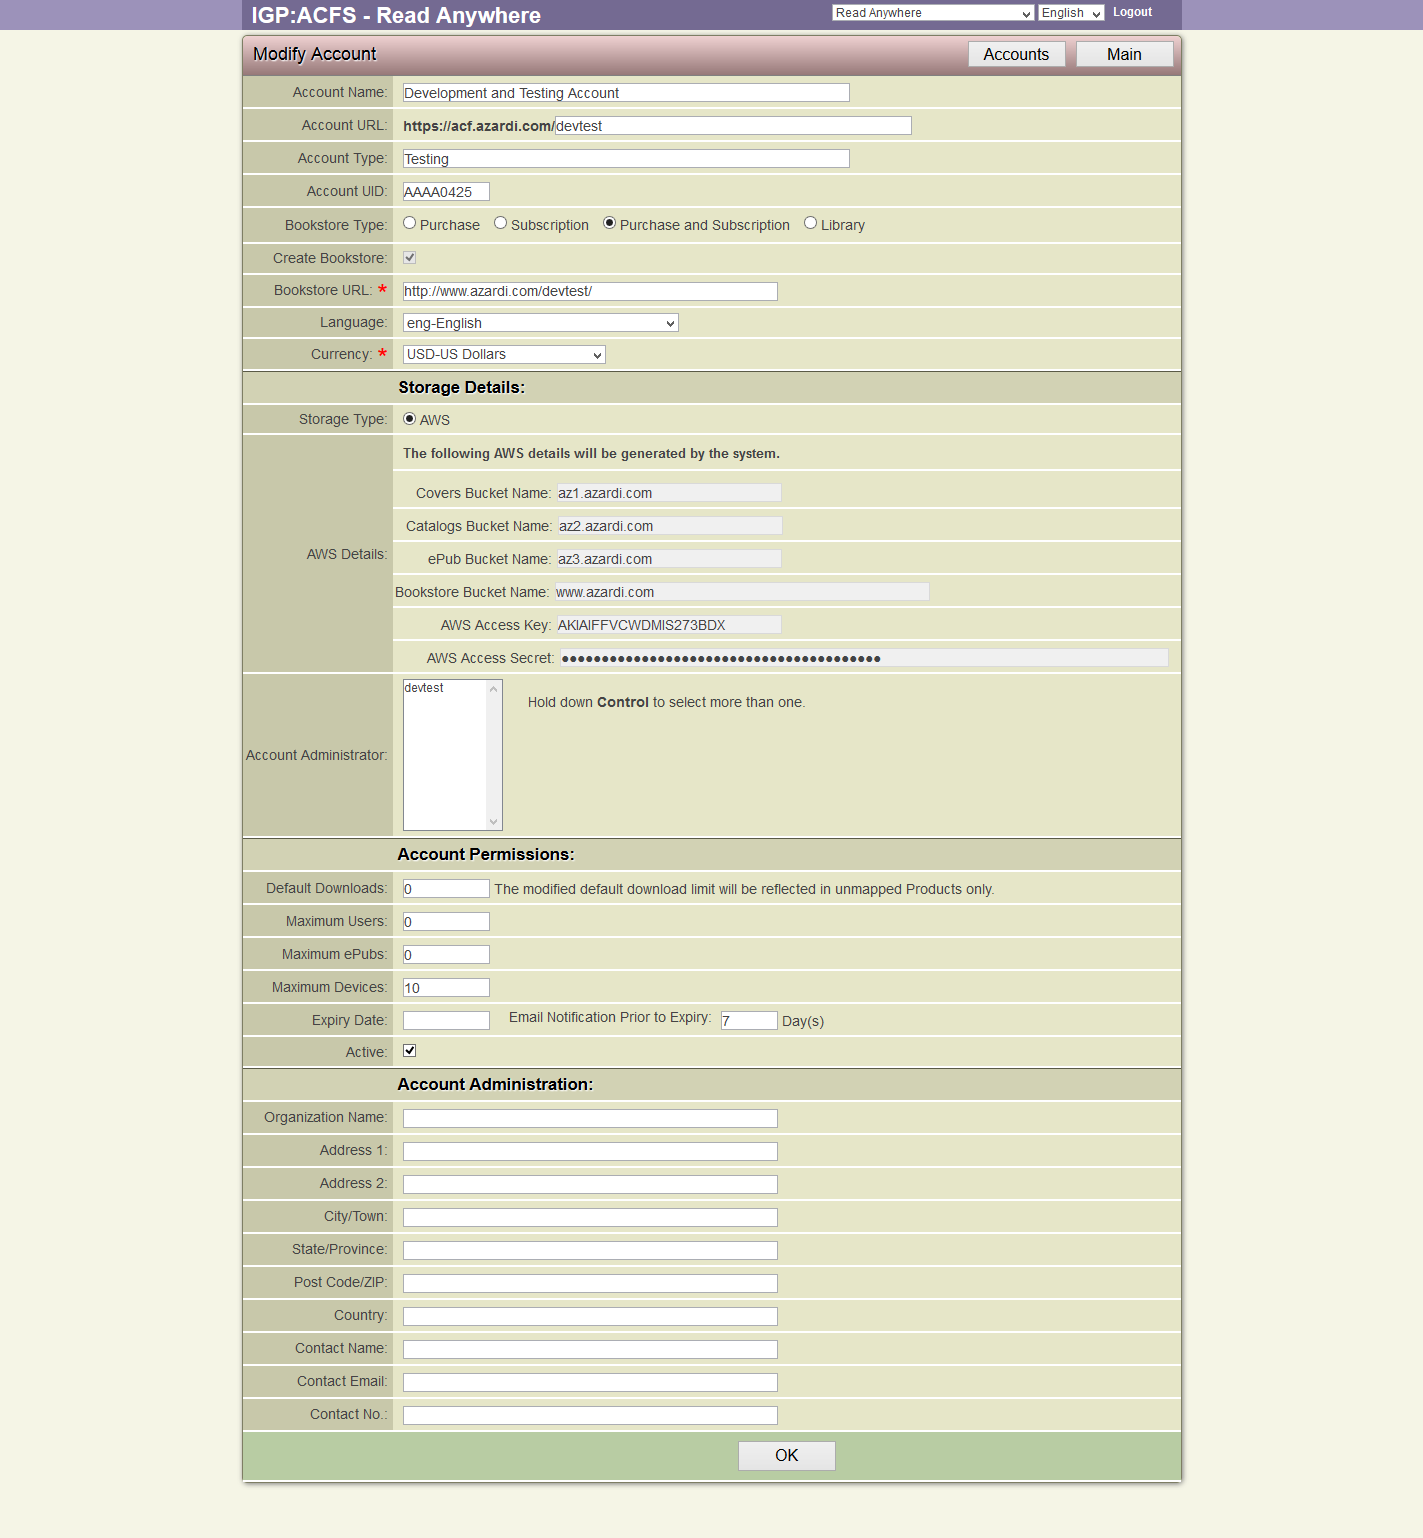
4. Make the necessary modifications and click Save to modify the account.
5. To close the form without modifying the account, click Cancel. This action will take you back to the Accounts list page.
Delete
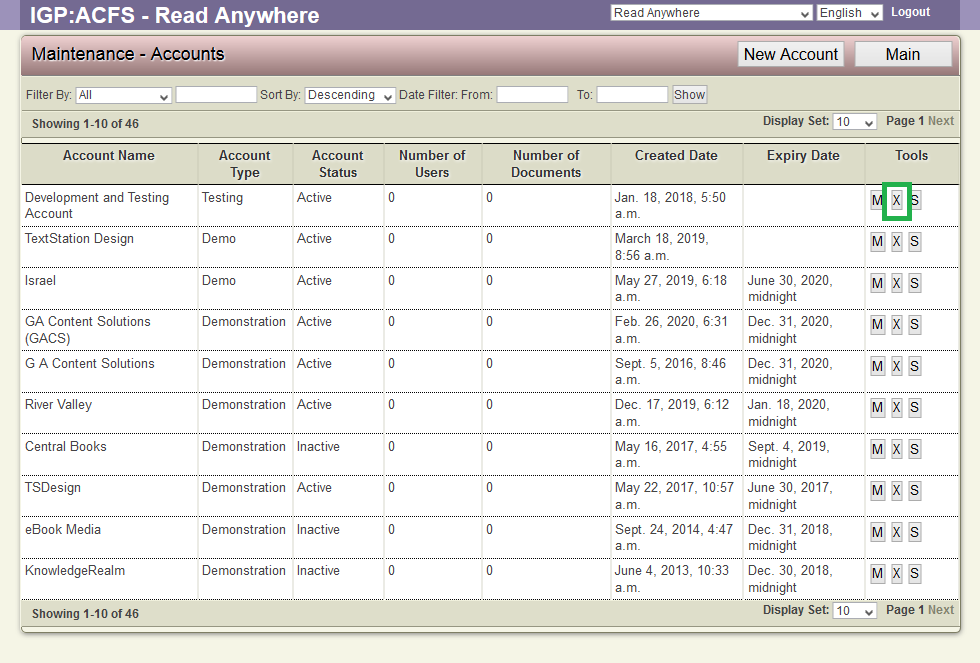
1. Browse for the Account you want to Delete.
2. After finding the particular account you want to delete, click the Delete this Account button from the Tools section of the account. This square button has the Letter X inside it.
3. The Confirmation Dialog Box will appear on your screen.
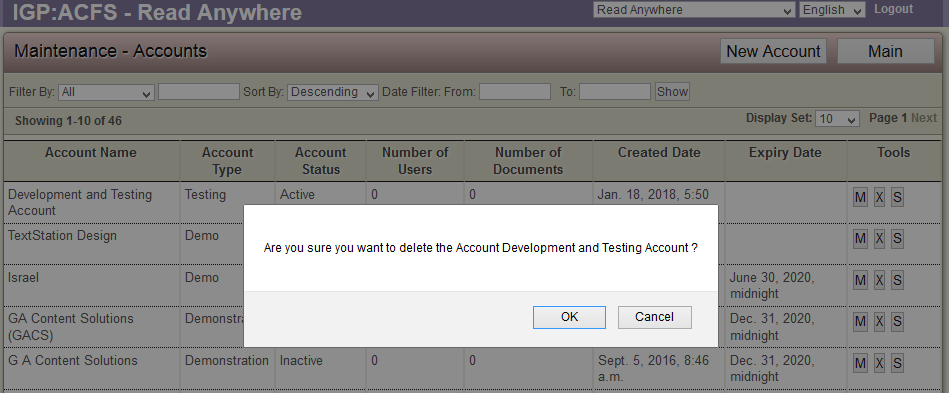
4. To confirm the deletion of the the account, click OK.
5. If you don't want to delete the account, click Cancel.
Note:
When you delete an account, all the data of that account will also be deleted. Delete only when you are absolutely sure that the particular account will not be of any use in the future. You cannot recover an account once it is deleted. So proceed with caution when it comes to deleting an account.
Summary
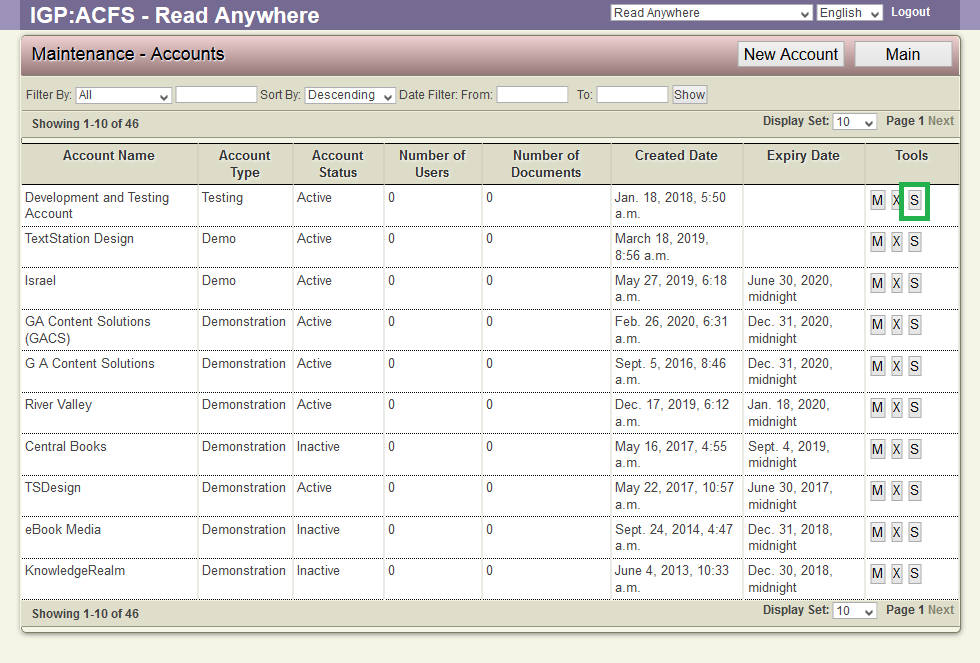
1. Browse for the account you want to view summary.
2. After finding the particular account you want to view the summary of, click the Account Summary button from the Tools section of the account. This square button has the Letter S inside it.
3. A pop-up box showing the number of users, book catalogs and documents will appear.
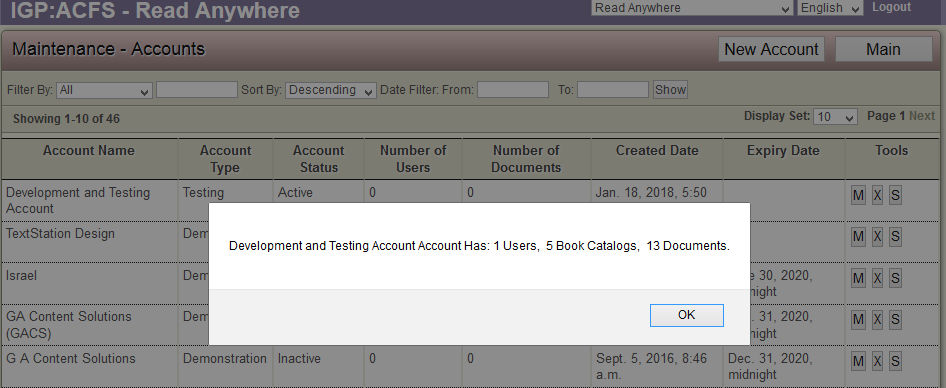
4. Click OK to close the box and return to the Accounts Page.