LEARN@IGP IGP:Digital Publisher Management
17
Accounts
Main | Maintenance | Accounts
- Create a new Account
- To Start
- To create a new Account
- Details of the Create New Account form
- Description
- Account Permissions
- Account Administration
- View the summary of an account
- To Start
- To view the summary of an account
- Modify an Account
- To Start
- To modify an Account
- To assign a new Account Administrator
- 1. Select from existing Users
- 2. Create a new Account Administrator
- Delete an Account
- To Start
- To delete an Account
The Accounts maintenance helps in the creation of new accounts as well as in the modification of existing ones.
Create a new Account
To Start
- You must have maintainer privileges to create a new Account.
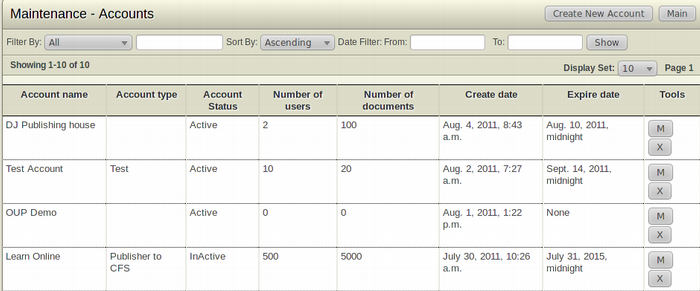
- From the Main Page, click Accounts under the Maintenance section. This action will transfer you to the Accounts Screen.
- The Accounts Screen displays a list of existing accounts along with a short description and detail of each.
To create a new Account
- From the top right toolbar in the page, click Create New Account to create a new account.
- The Add New Account form will appear.
- Fill in the various field of the form and click Save to create the new account.
- Click Cancel to close the form without creating a new account and return to the previous page.
Note: You must wait for atleast 30secs-1min before logging in as the Admin User of the newly created account as the entry added in the apache configuration file gets checked every one minute.
Details of the Create New Account form
Highlighted fields(*) are mandatory fields. If you leave a highlighted field, then the account will not be created. A Dialogue Box will appear asking you to fill up all the mandatory fields.
Description
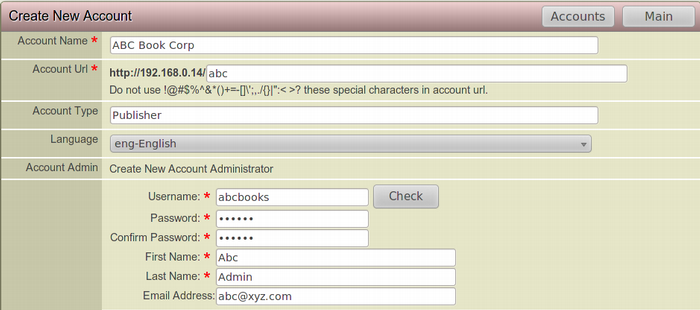
- Account Name:(Mandatory) Enter an account name of your choice.
- Account URL:(Mandatory) The Account URL is your core installation URL(already provided) plus an account name. The account name cannot have any spaces or special characters. Use only A-Z, a-z, 0-1. The account name cannot be modified, once it is created. Remember that, it is going to be a URL, so keep it short and memorable. Eg: http://www.igpecms.com/abc
- Account Type: Enter the type of account.
- Account Admin:(Mandatory) Enter the details required for the creation of a new account administrator in the fields given.
Account Permissions
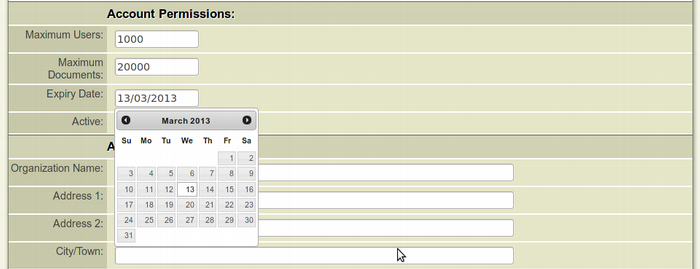
- Maximum Users: Enter the number of users who can access and have the privilege to create and edit documents in the account.
- Maximum Documents: Enter the number of documents that can be created and stored in the account.
- Expiry Date: A pop-up calendar will appear when you click on the entry field. Select the expiry date of the account from the calendar.
- Active: Select the checkbox to make the account active.
Account Administration

- Organization Name: Enter the name of the organization that has control over the account.
- Address 1: Enter the address of the organization.
- Address 2: Enter the secondary address of the organization.
- City/Town: Enter the name of the city or the town where the organization is located.
- State/Province: Enter the state or the province where the organization is located.
- Post Code/ZIP: Enter the postal code of the region where the organization is located.
- Country: Enter the country where the organization is located.
- Contact Name: Enter the name of the person to contact on behalf of the organization.
- Contact Email: Enter the email address of the person to contact on behalf of the organization.
- Contact Phone: Enter the phone number of the person to contact on behalf of the organization.
- Contact Mobile: Enter the mobile number of the person to contact on behalf of the organization.
View the summary of an account
To Start
- You must have maintainer privileges to view the summary of an account.
- From the Main Page, click Accounts under the Maintenance section. This action will transfer you to the Accounts Screen.
- The Accounts Screen displays a list of existing accounts along with a short description and detail of each.
To view the summary of an account
- Browse for the account you want to view summary.
- After finding the particular account you want to view the summary of, click the Account Summary button from the Tools section of the account. This square button has the Letter S inside it.
- A pop-up box showing the number of Users, Projects and Documents will appear.
- Click OK to close the box and return to the Accounts page.
Modify an Account
To Start
- You must have maintainer privileges to create a new Account.
- From the Main Page, click Accounts under the Maintenance section. This action will transfer you to the Accounts Screen.
- The Accounts Screen displays a list of existing accounts along with a short description and detail of each.
To modify an Account
- Browse for the account you want to modify.
- After finding the particular account you want to modify, click the Modify this Account (Blue) button from the Tools section of the account. This square button has the Letter M inside it.
- The Modify Account form will appear on the screen. this form is actually a filled-up Create New Account form.
- Make the necessary modifications and click Save to modify the account.
- To close the form without modifying the account, click Cancel. This action will take you back to the Accounts list page.
To assign a new Account Administrator
1. Select from existing Users
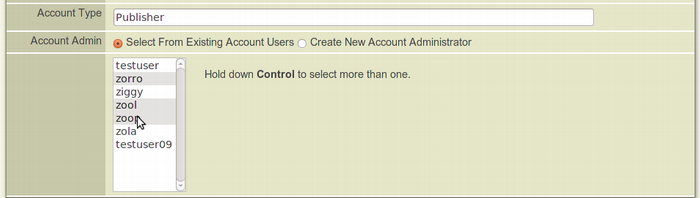
In the Modify Account form (Account Admin field),select and highlight the user you want to assign as the Account Administrator. To assign multiple users as Admin, hold the "Control" key in your keyboard while selecting the users.
2. Create a new Account Administrator
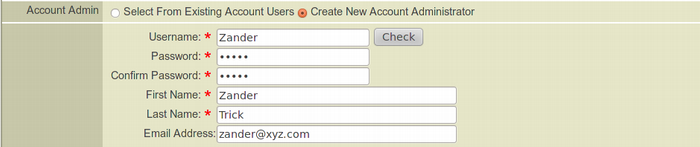
To create a new Account Administrator, select the Create new Account Administrator Check Circle. the Create New account Administrator Form will appear. Fill in the fields required and the new user will be assigned as the Account Administrator of the account. Highlighted fields are mandatory.
Delete an Account
Firstly, it is recommended not to delete any account. It is better to keep an account Inactive by unchecking the Active Box in the Modify Account form than deleting the Account completely. When you delete an account, all the documents of that account will also be deleted. Delete only when you are absolutely sure that the particular account will not be of any use in the future.
To Start
- You must have maintainer privileges to create a new Account.
- From the Main Page, click Accounts under the Maintenance section. This action will transfer you to the Accounts Screen.
- The Accounts Screen displays a list of existing accounts along with a short description and detail of each.
To delete an Account
- Browse for the Account you want to Delete.
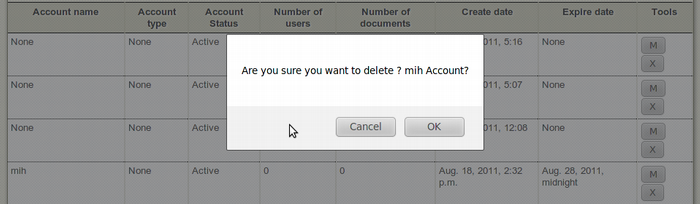
- After finding the particular account you want to delete, click the Delete this Account (Red) button from the Tools section of the account. This square button has the Letter X inside it.
- The Confirmation Dialog Box will appear on your screen.
- To confirm the deletion of the account, click OK.
- If you don't want to delete the account, Click Cancel.

Warning: You cannot recover an account once it is deleted. So, proceed with caution when it comes to deleting a account.